Auth0
Auth0 is a flexible, drop-in solution to add authentication and authorization services to your applications.
This guide shows you how to build a Fraud Detection Flow that runs before user registration in Auth0, and uses TrustPath to detect and block potentially fraudulent sign-ins and sign-ups.
The core idea: whenever a user registers, Auth0 sends data to TrustPath to verify it. Based on the risk score it returns, Auth0 action is taken.
We also support features like account takeover detection, impossible travel, and credential sharing. In these cases, you can use the same approach with a different trigger event such as Post Login.
What you need
Here's what you need to get started.
- Auth0 account - Create one for free if you haven't already.
- TrustPath account - Sign up here if you don't have one. A free account does not require any payment information.
- TrustPath API access - Grab an API key from the TrustPath console.
Step 1: Set up your TrustPath API key
TrustPath requires an API key to authenticate your requests, in this case a request that originates from the Auth0 action. To get your API Key:
- Log in to the TrustPath Console.
- On the left-hand menu, go to [Your Name] > API Keys.
- Copy either one of the API keys provided there.
We will need that in just a minute.
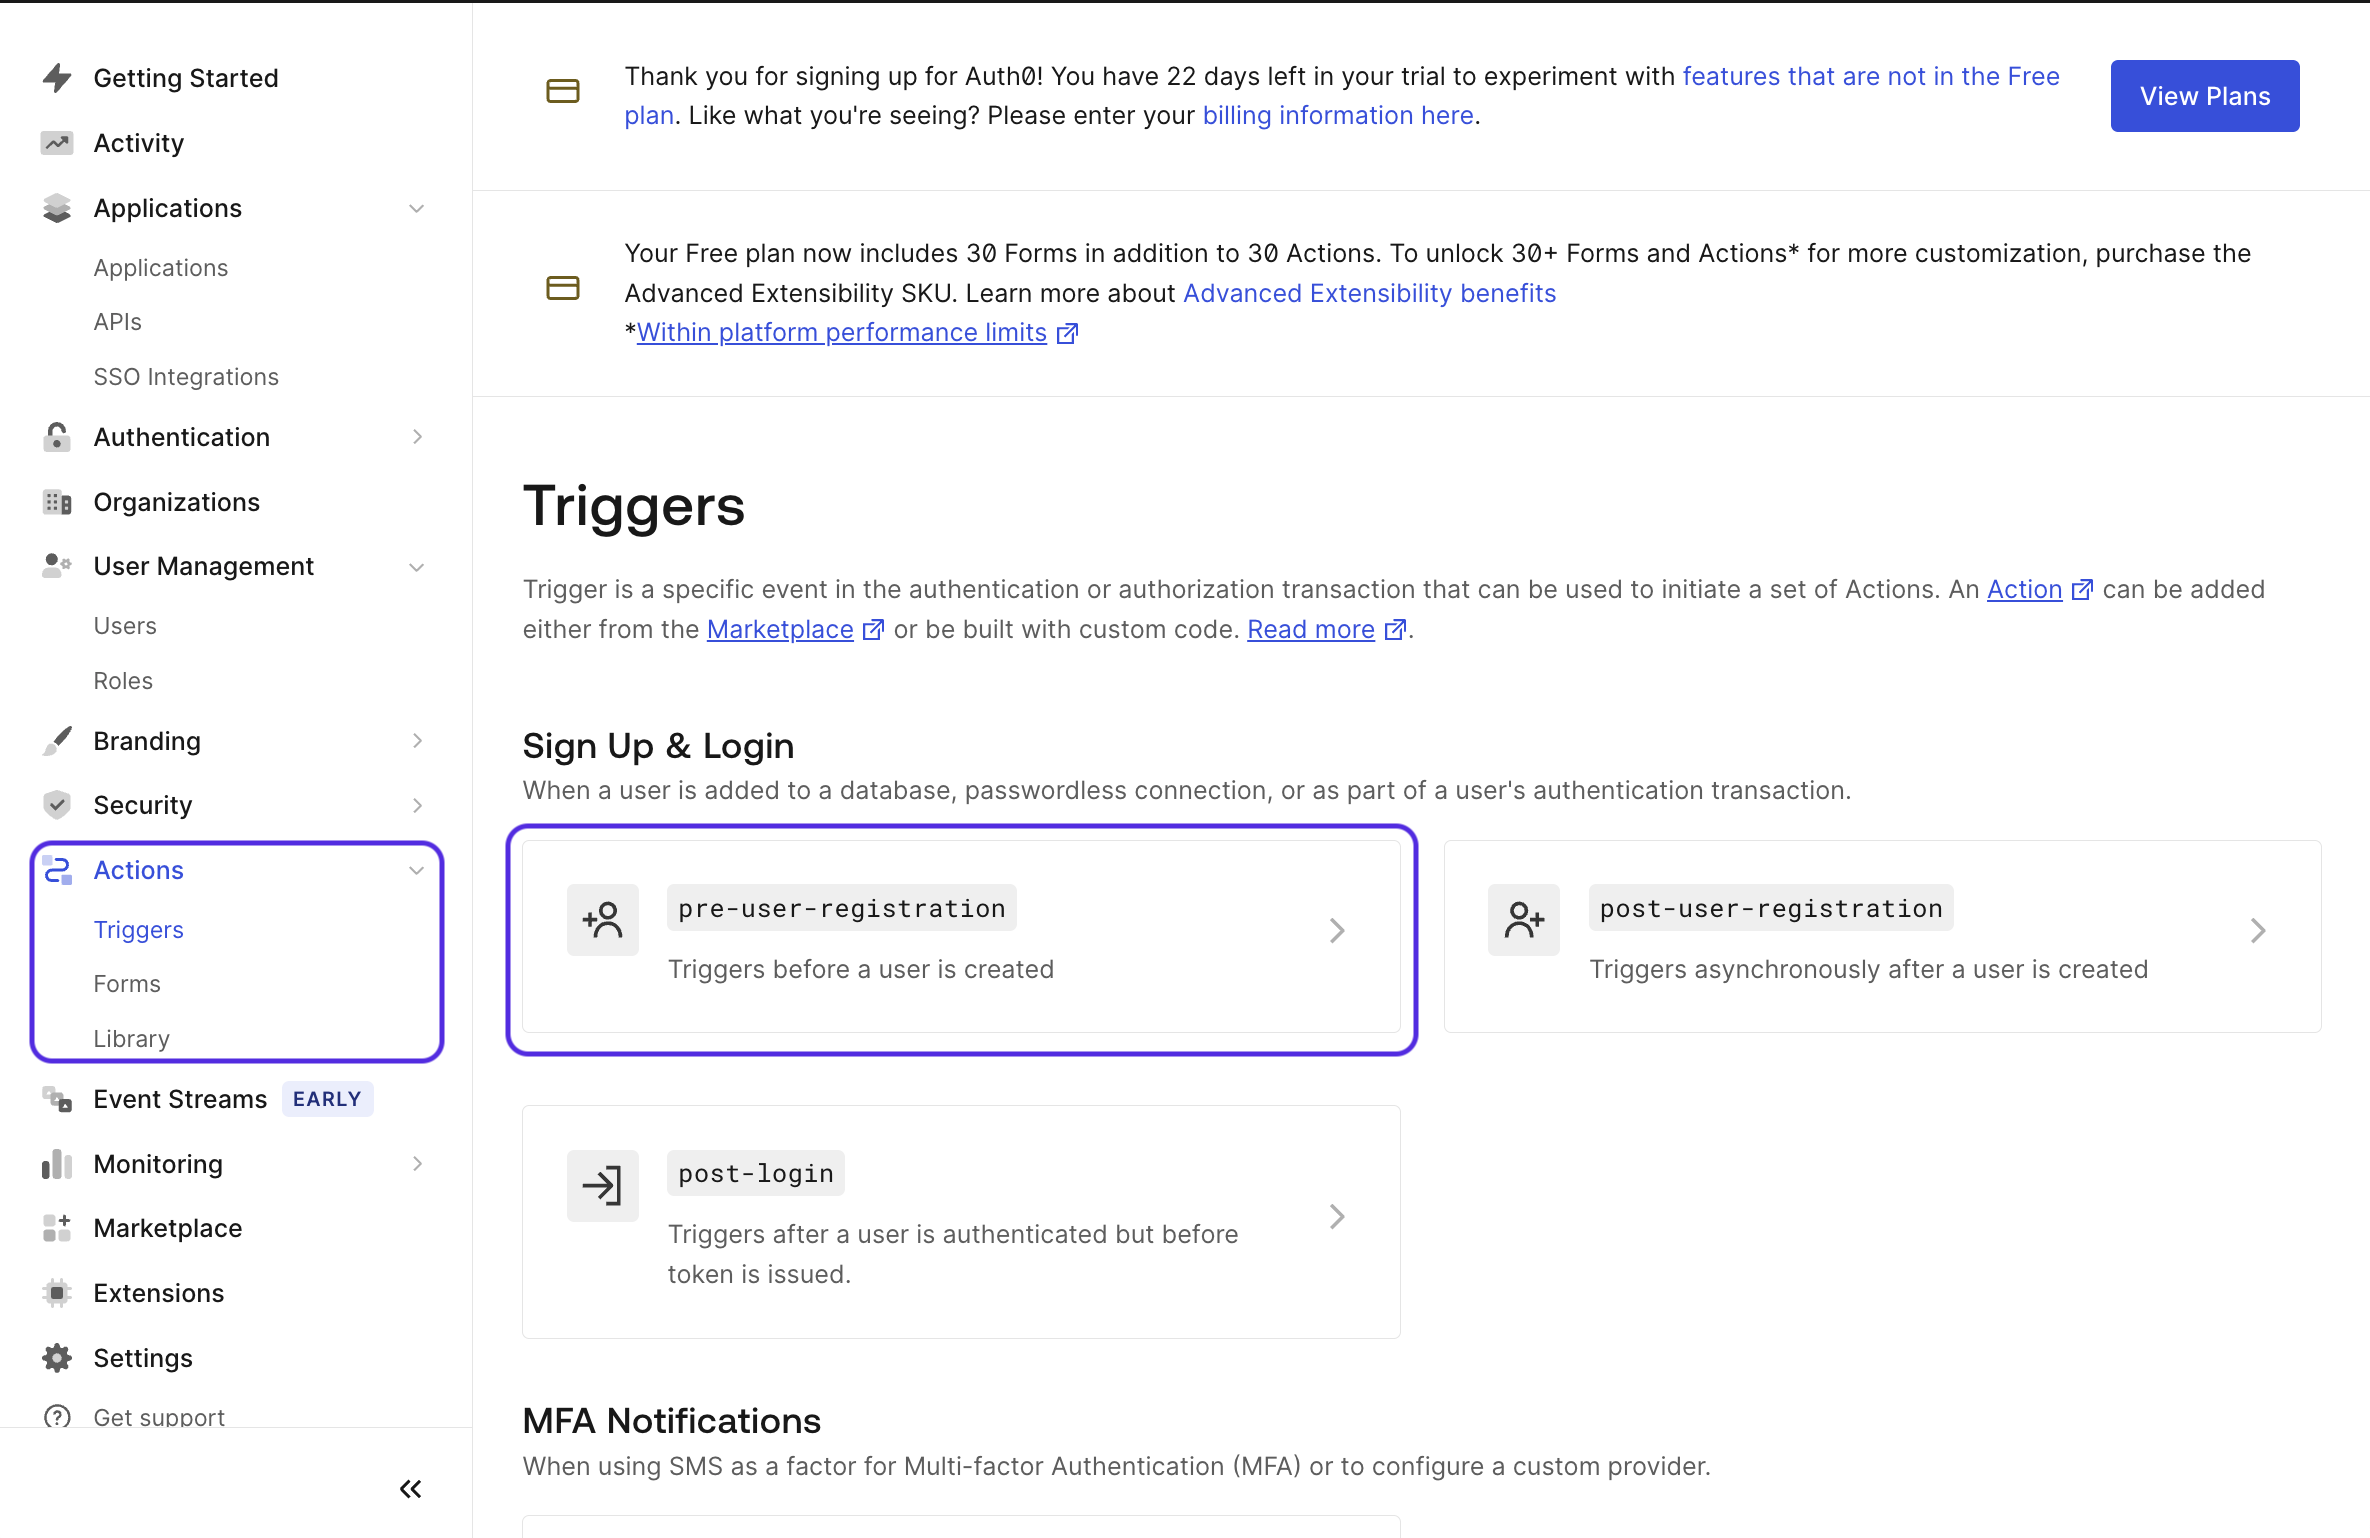
Step 2: Create a custom action
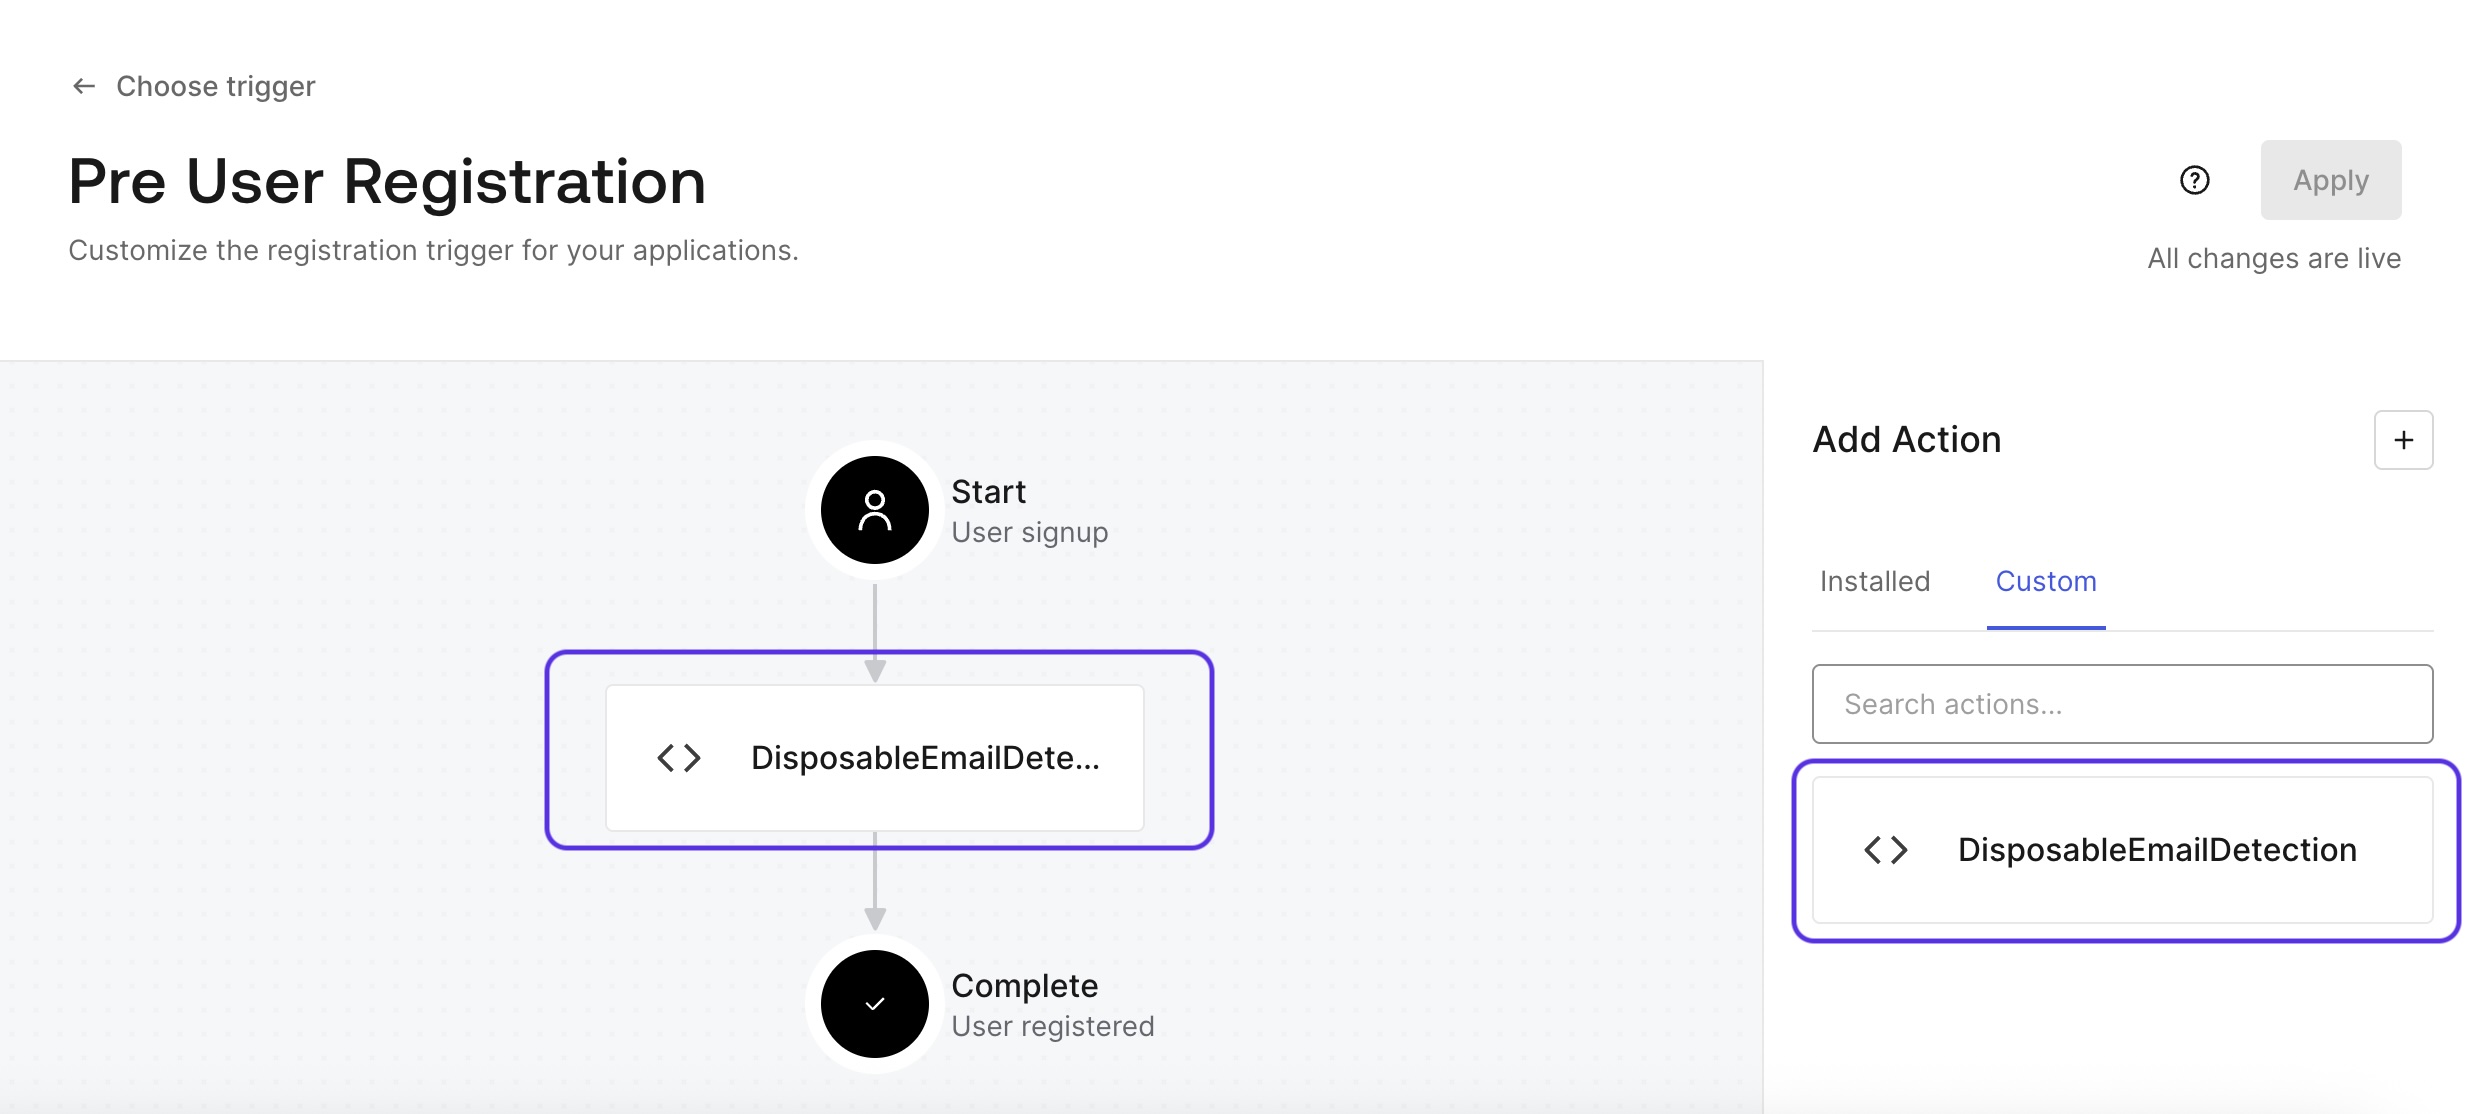
Assuming you already have an authentication flow that is wired up to your application and working, the next step will be creating Triggers and Actions in Auth0.
Go to Actions -> Triggers -> Select Pre User Registration trigger.
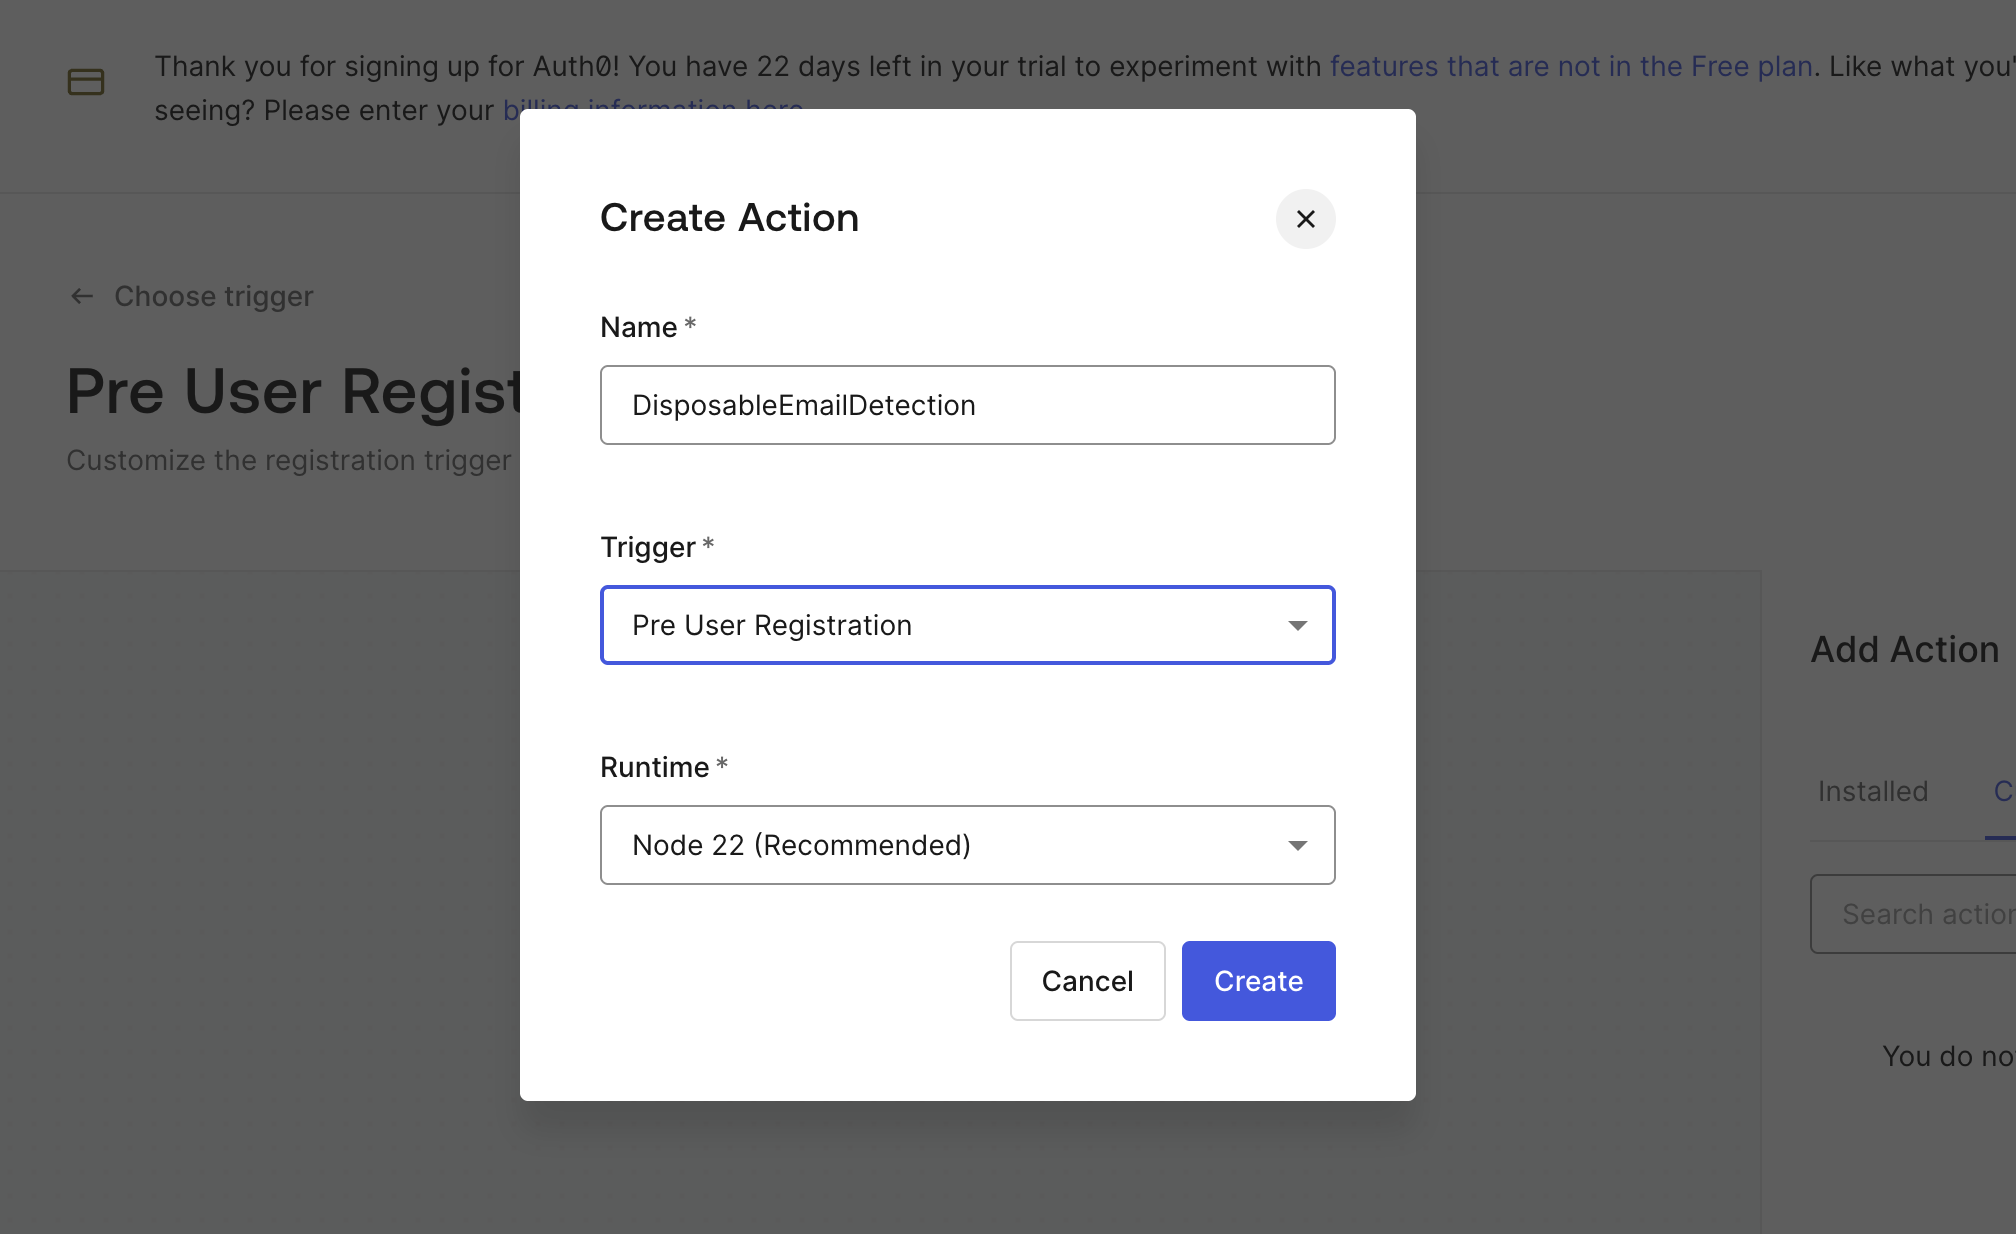
On the right-hand side, select Custom Action and click on Create Action.
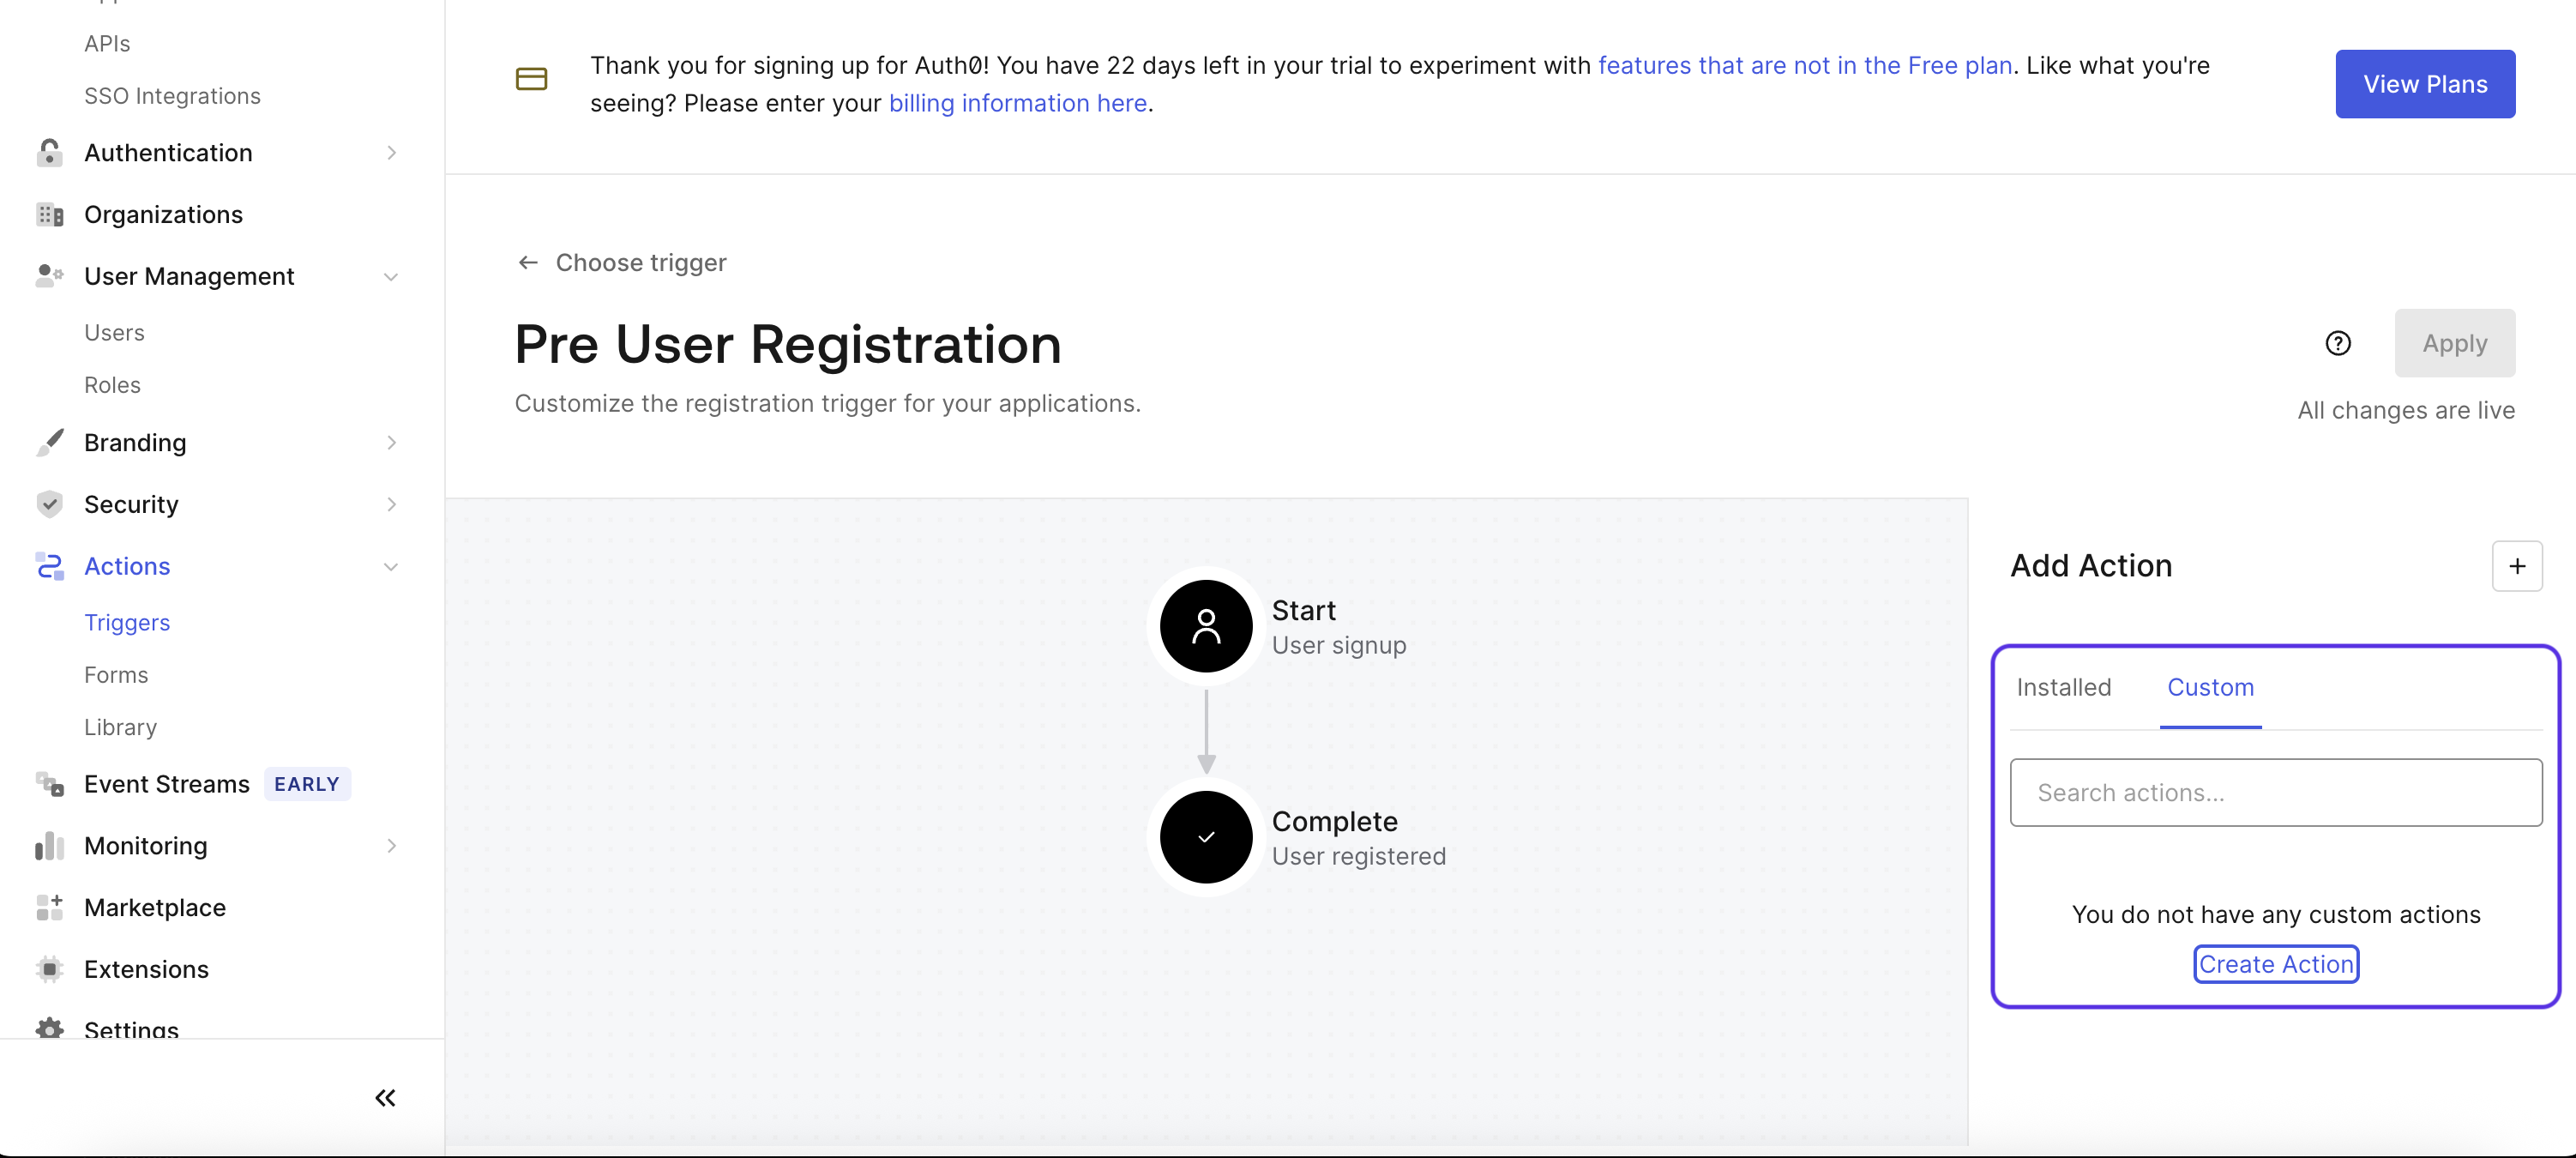
Fill in the form with the name DisposableEmailDetection.
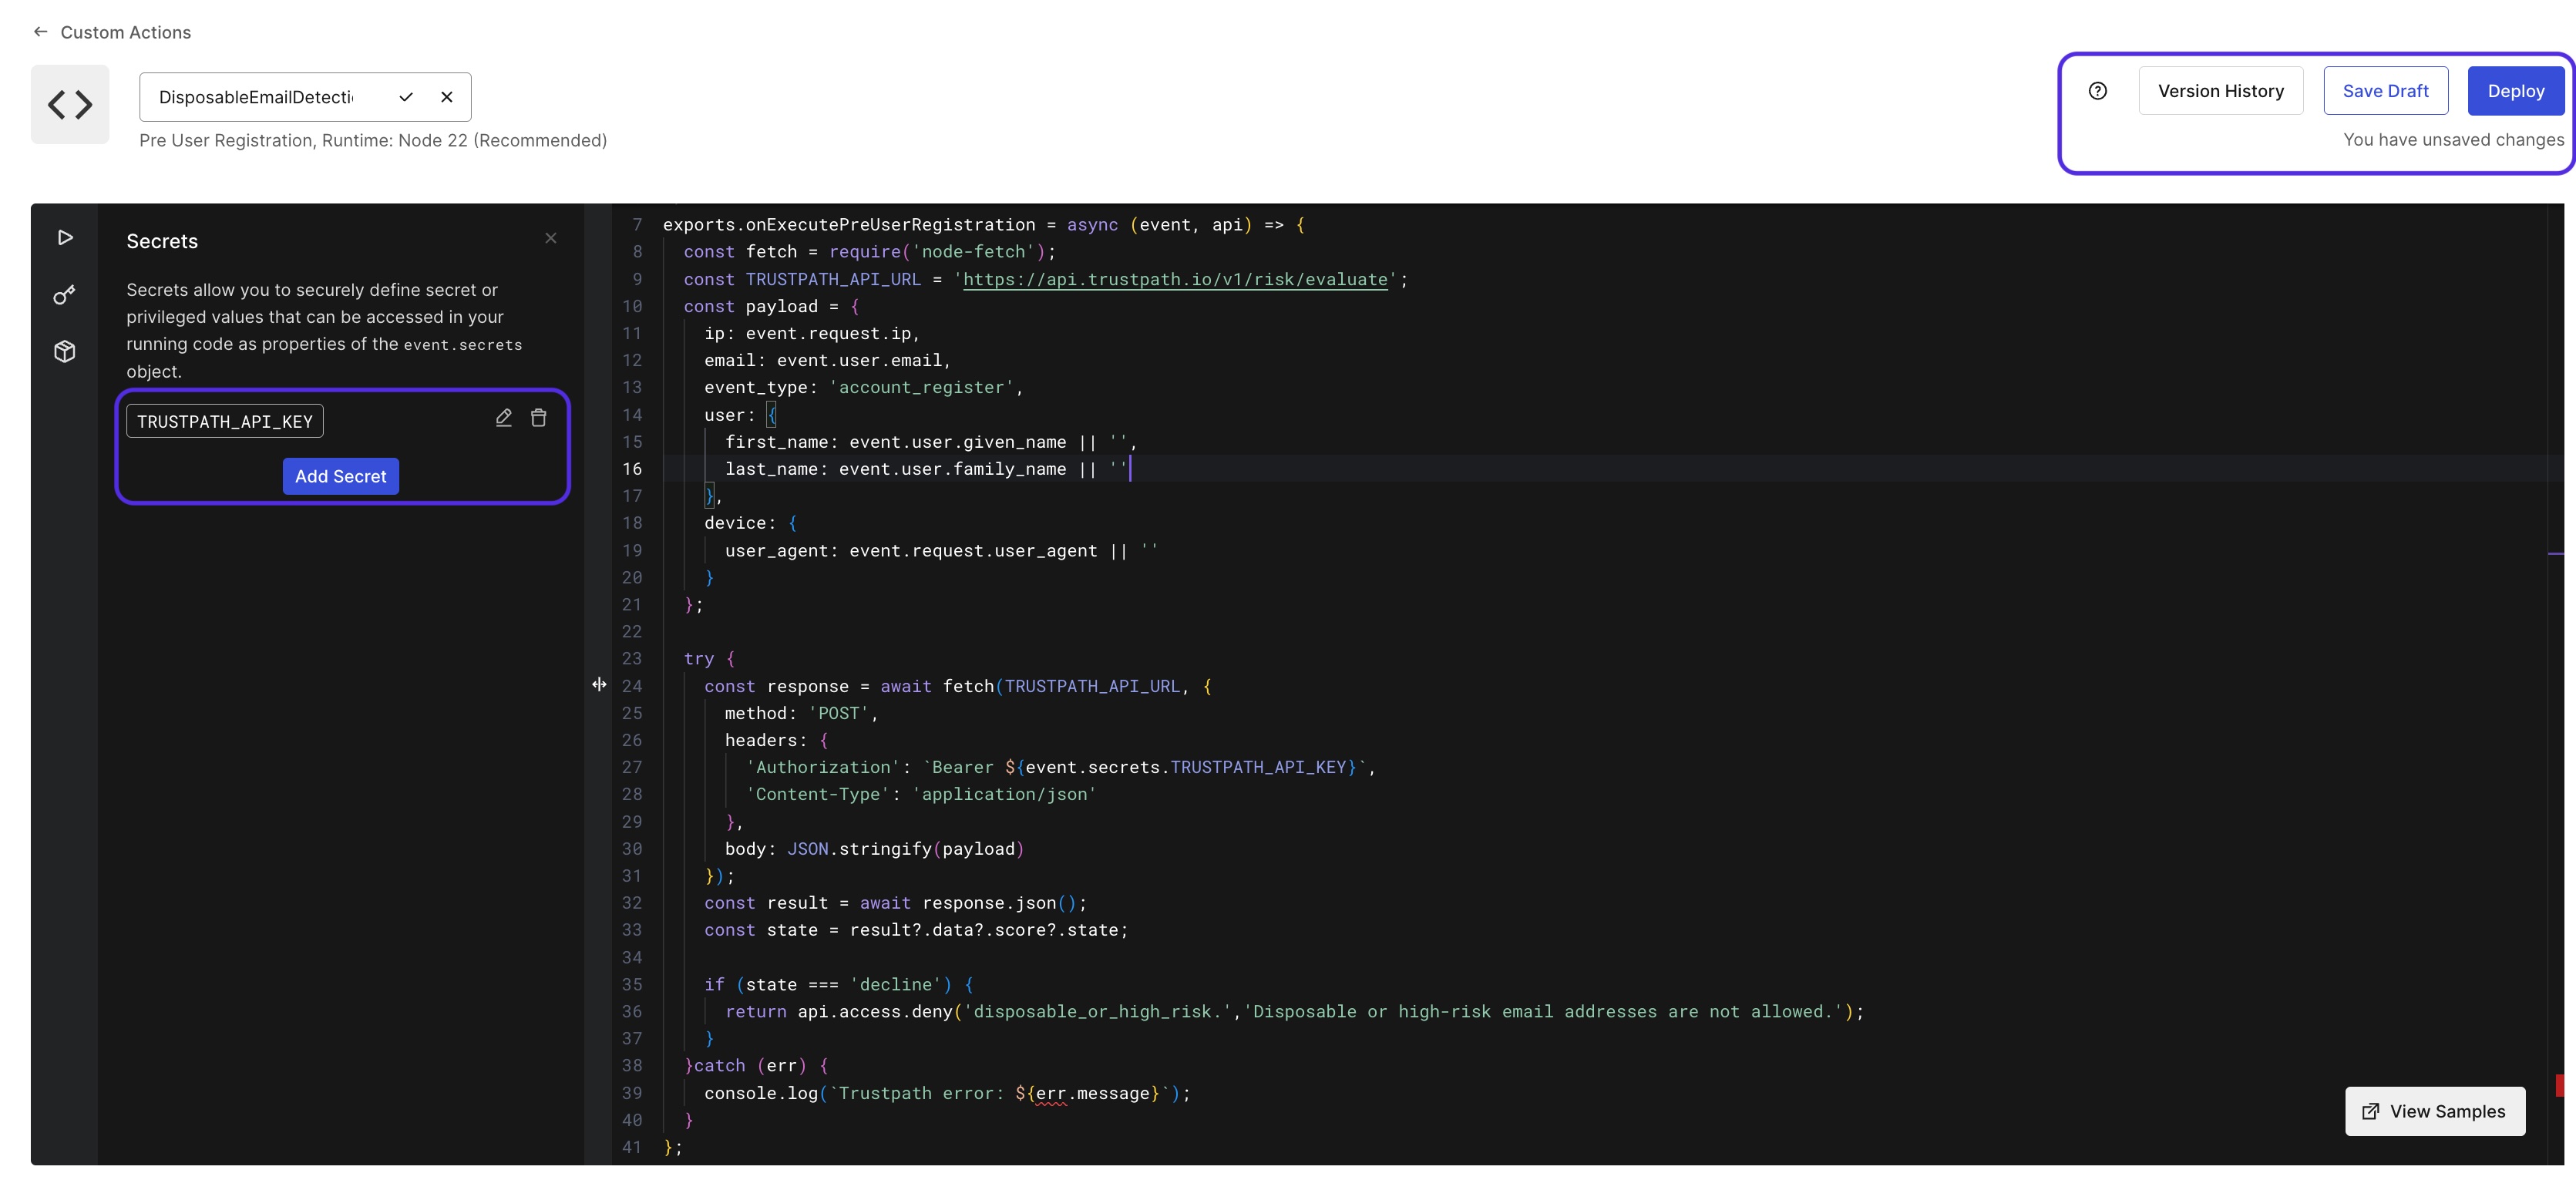
Step 3: Define the custom action
In the custom action, what we want to do is collect the information that we need and send it to TrustPath. Based on the response, we decide whether to allow the registration or not. This is a piece of JavaScript code that will run in the Auth0 environment. The code looks as follows:
/**
 * Handler that will be called during the execution of a PreUserRegistration flow.
 *
 * @param {Event} event - Details about the context and user that is attempting to register.
 * @param {PreUserRegistrationAPI} api - Interface whose methods can be used to change the behavior of the signup.
 */
exports.onExecutePreUserRegistration = async (event, api) => {
  const fetch = require("node-fetch");
  const TRUSTPATH_API_URL = "https://api.trustpath.io/v1/risk/evaluate";
  const payload = {
    ip: event.request.ip,
    email: event.user.email,
    event_type: "account_register",
    user: {
      first_name: event.user.given_name || "",
      last_name: event.user.family_name || "",
    },
    device: {
      user_agent: event.request.user_agent || "",
    },
  };

  try {
    const response = await fetch(TRUSTPATH_API_URL, {
      method: "POST",
      headers: {
        Authorization: `Bearer ${event.secrets.TRUSTPATH_API_KEY}`,
        "Content-Type": "application/json",
      },
      body: JSON.stringify(payload),
    });
    const result = await response.json();
    const state = result?.data?.score?.state;

    if (state === "decline") {
      return api.access.deny(
        "disposable_or_high_risk.",
        "Disposable or high-risk email addresses are not allowed."
      );
    }
  } catch (err) {
    console.log(`Trustpath error: ${err.message}`);
  }
};
As you can see from the code, once the onExecutePreUserRegistration method is called, it will send the user data to TrustPath and based on the response, it will either allow or deny the registration. If the response is decline, it will deny the registration and show a message to the user.
Now on the left-hand side, define a new secret called TRUSTPATH_API_KEY and paste the key you copied in step 1. Once you have the code, you can click on Deploy in the upper right corner.
Step 4: Adding the custom action to the Pre User Registration trigger
Go to Triggers -> Pre User Registration -> Select the custom action you have created, drag and drop it between Start and Complete in the diagram.
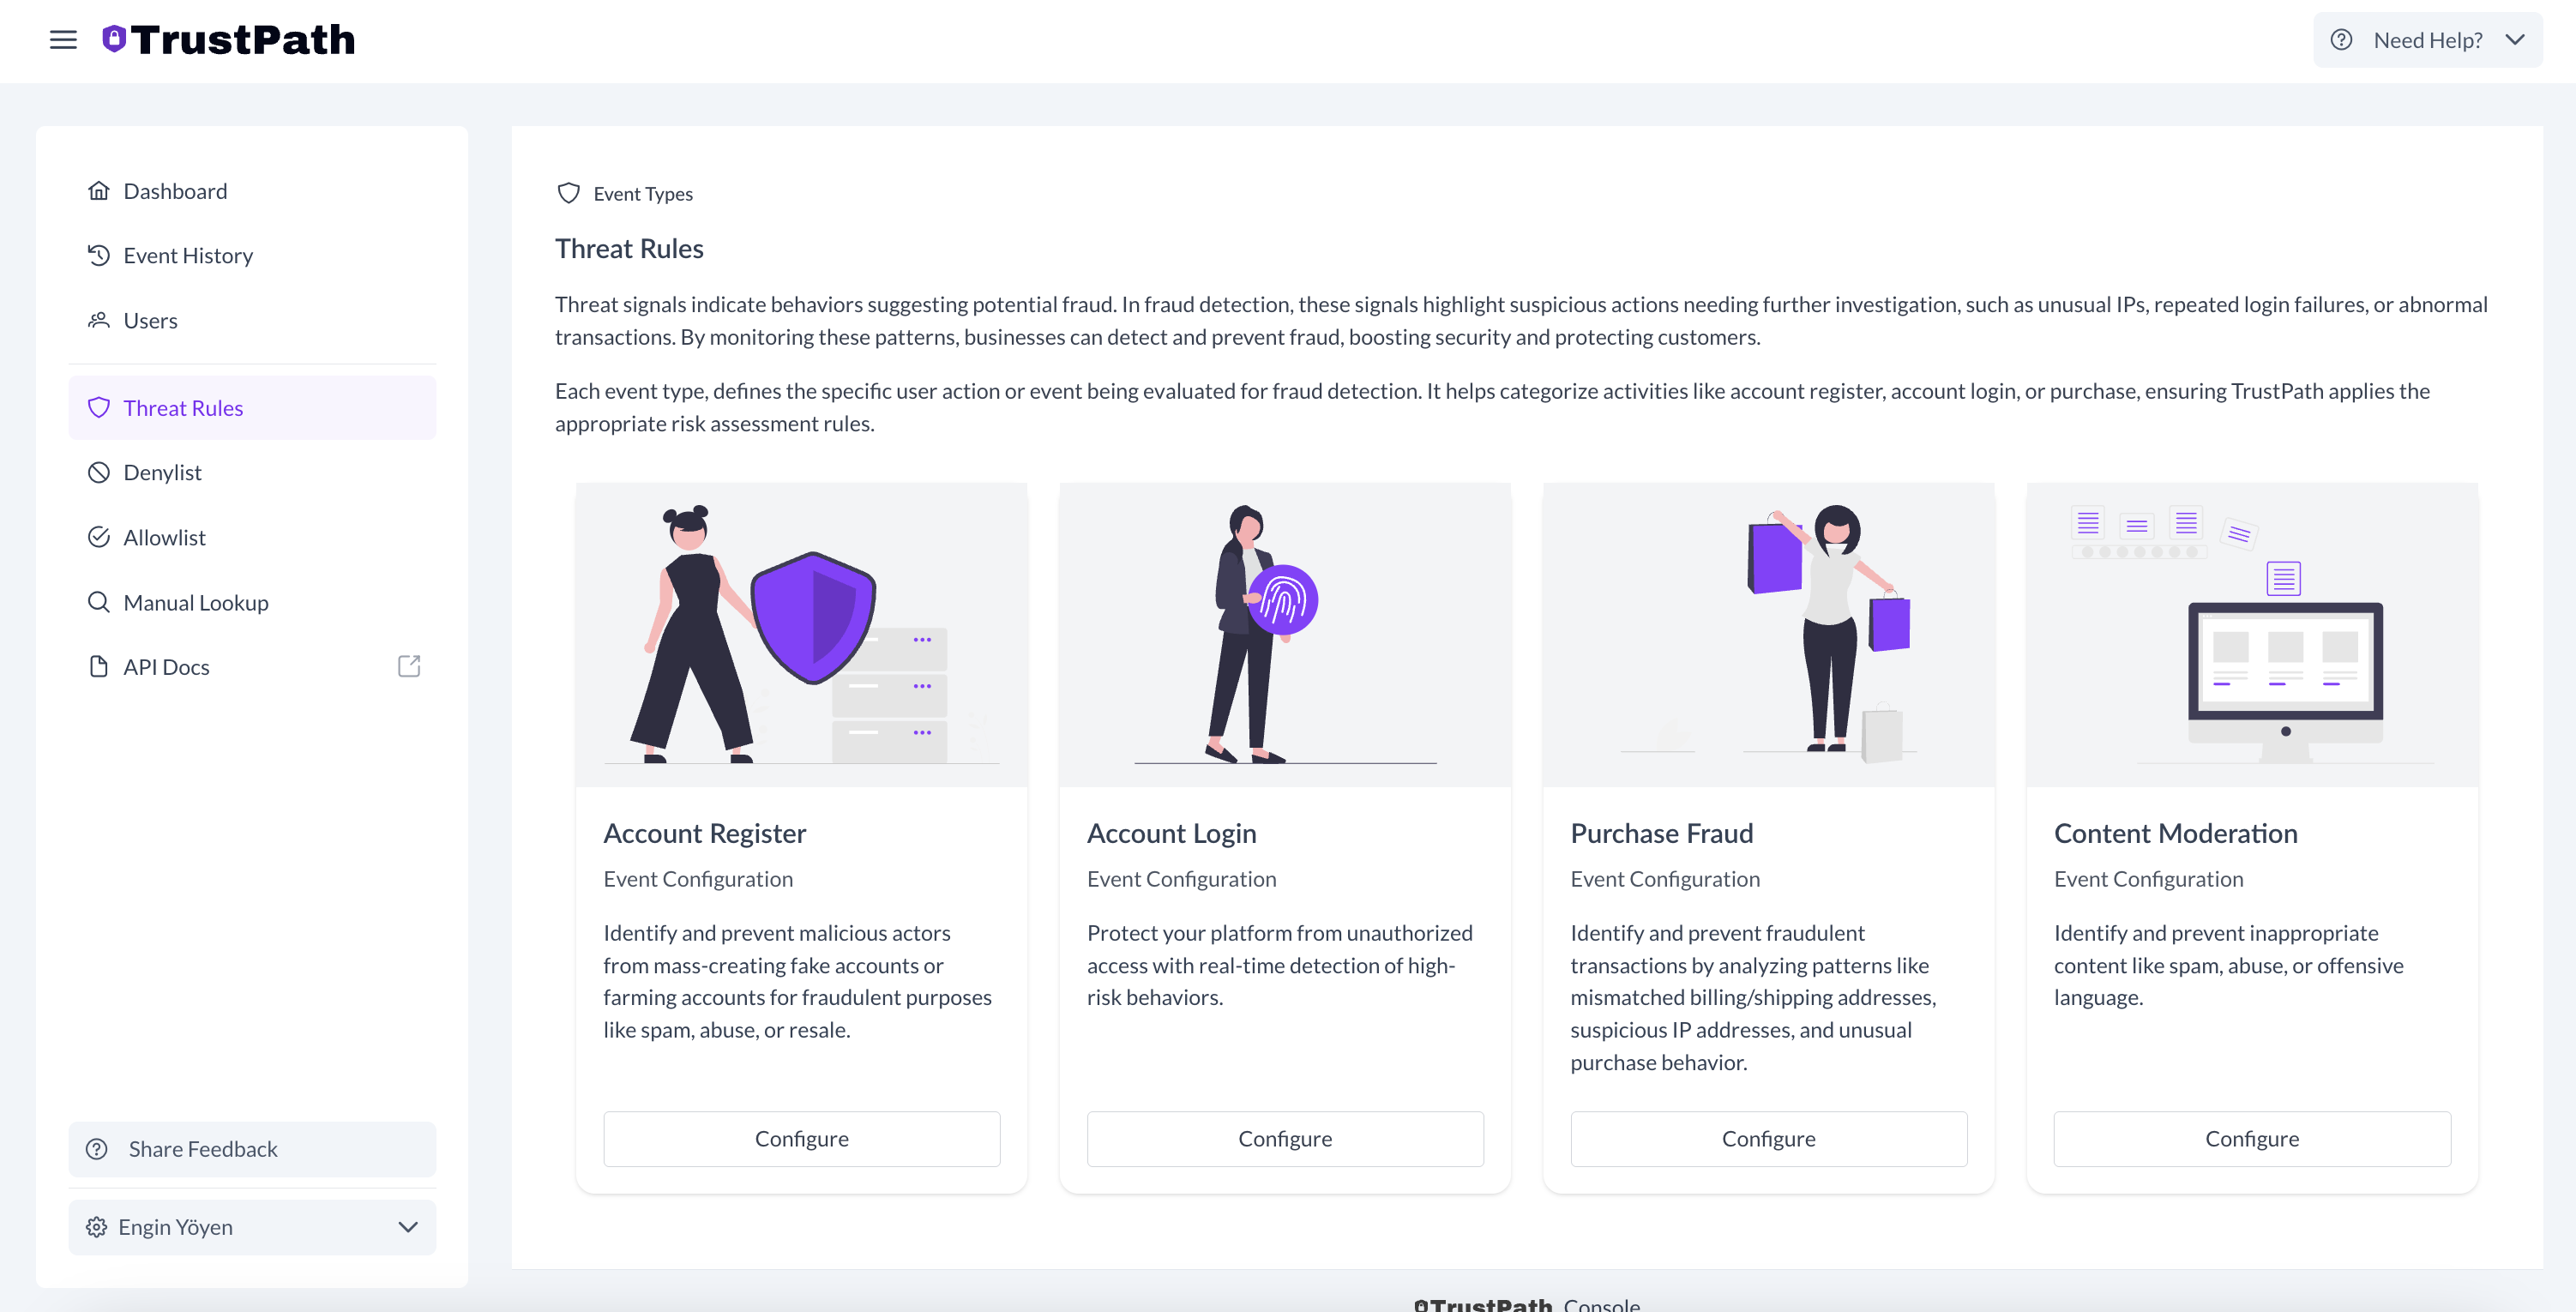
Step 5: Define TrustPath threat detection rules
TrustPath threat detection rules are individual risk assessment criteria designed to identify fraudulent activities. Each rule analyzes specific signals to detect suspicious behavior and assigns a risk score to the event.
Each risk detected then contributes to the total risk score, which ranges from 0 to 100.
- A score of 0 means no risk (approve)
- A score of 100 means very risky (decline)
Go to TrustPath Console and log in to your TrustPath account.
Select Threat Rules from the menu and choose the card labeled Account Register to configure it. TrustPath offers the flexibility to add your own rules, but it also provides default rules tailored to each event type.
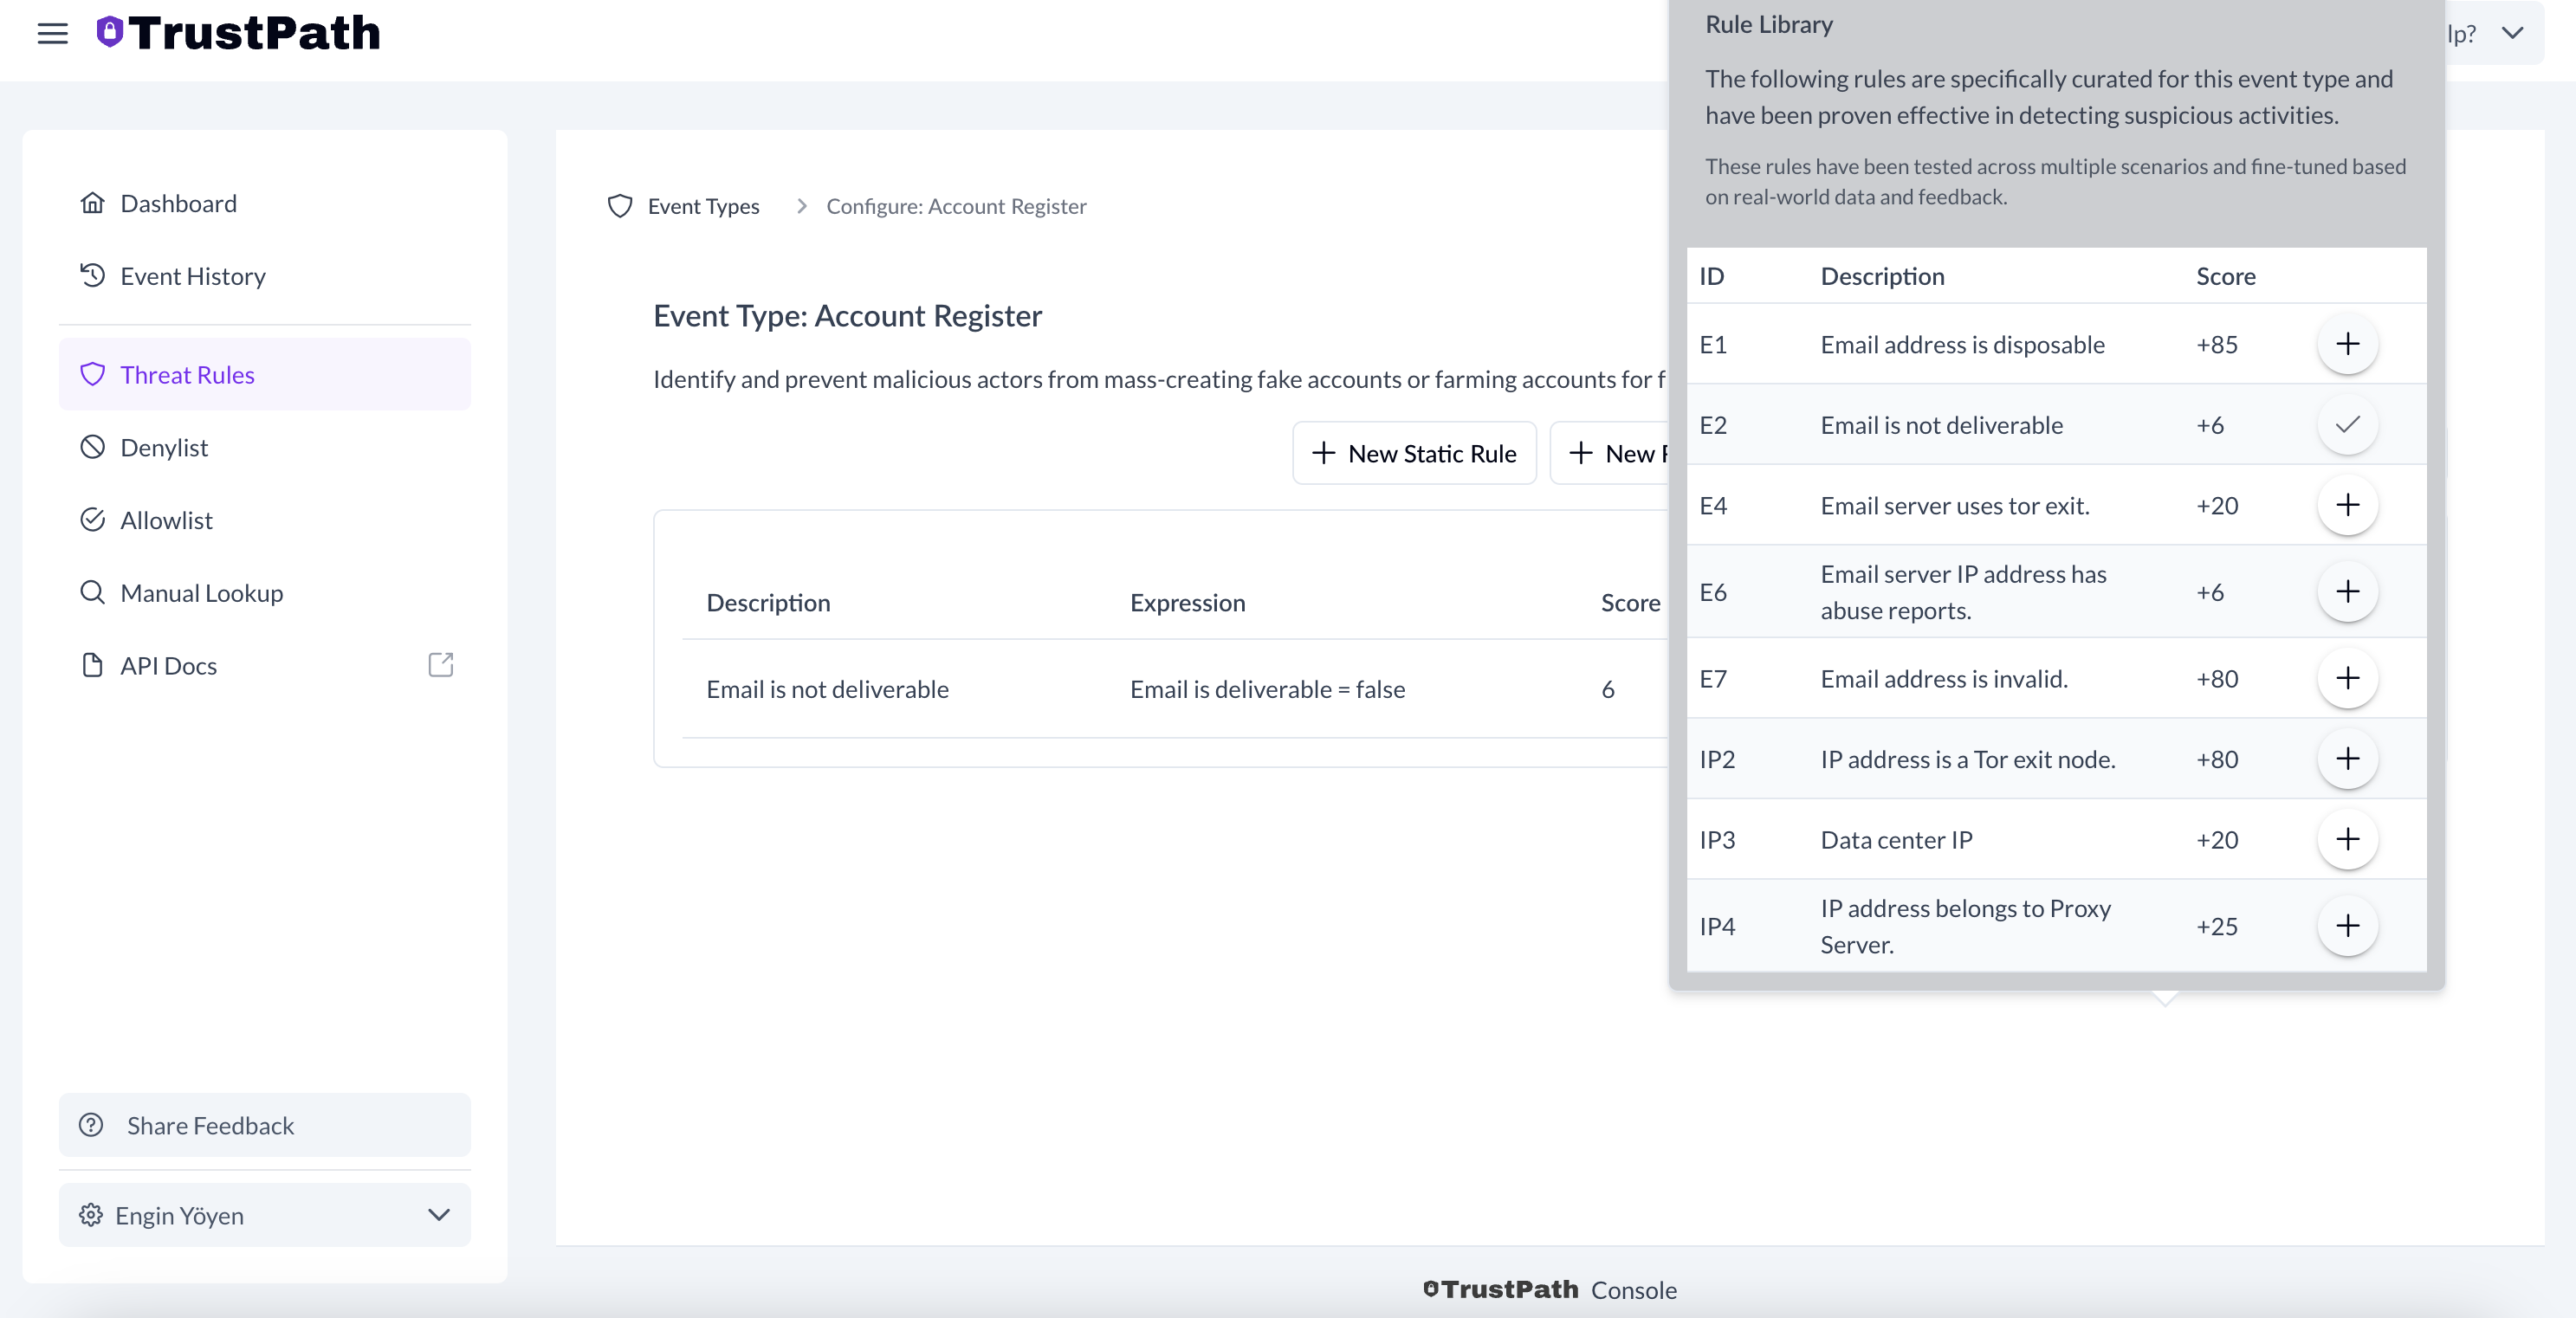
Here's an example of how to add a rule for the account register event.
- Select Add Rule From Library in the top right corner.
- From the list, select the following rules by clicking on each rule:
- Email addresses are disposable.
- IP Address is a Tor exit node.
- Email server IP addresses have abuse reports.
This will enable any new account registration on Auth0 to perform IP and email threat signal checks.
Next, configure rules for the account login event. For this, we want to prevent users from entering the system with disposable email addresses, as well as detect rapid IP changes, which can be a sign of unusual behavior. You can naturally add other events from the library or add custom rules that fit your needs.
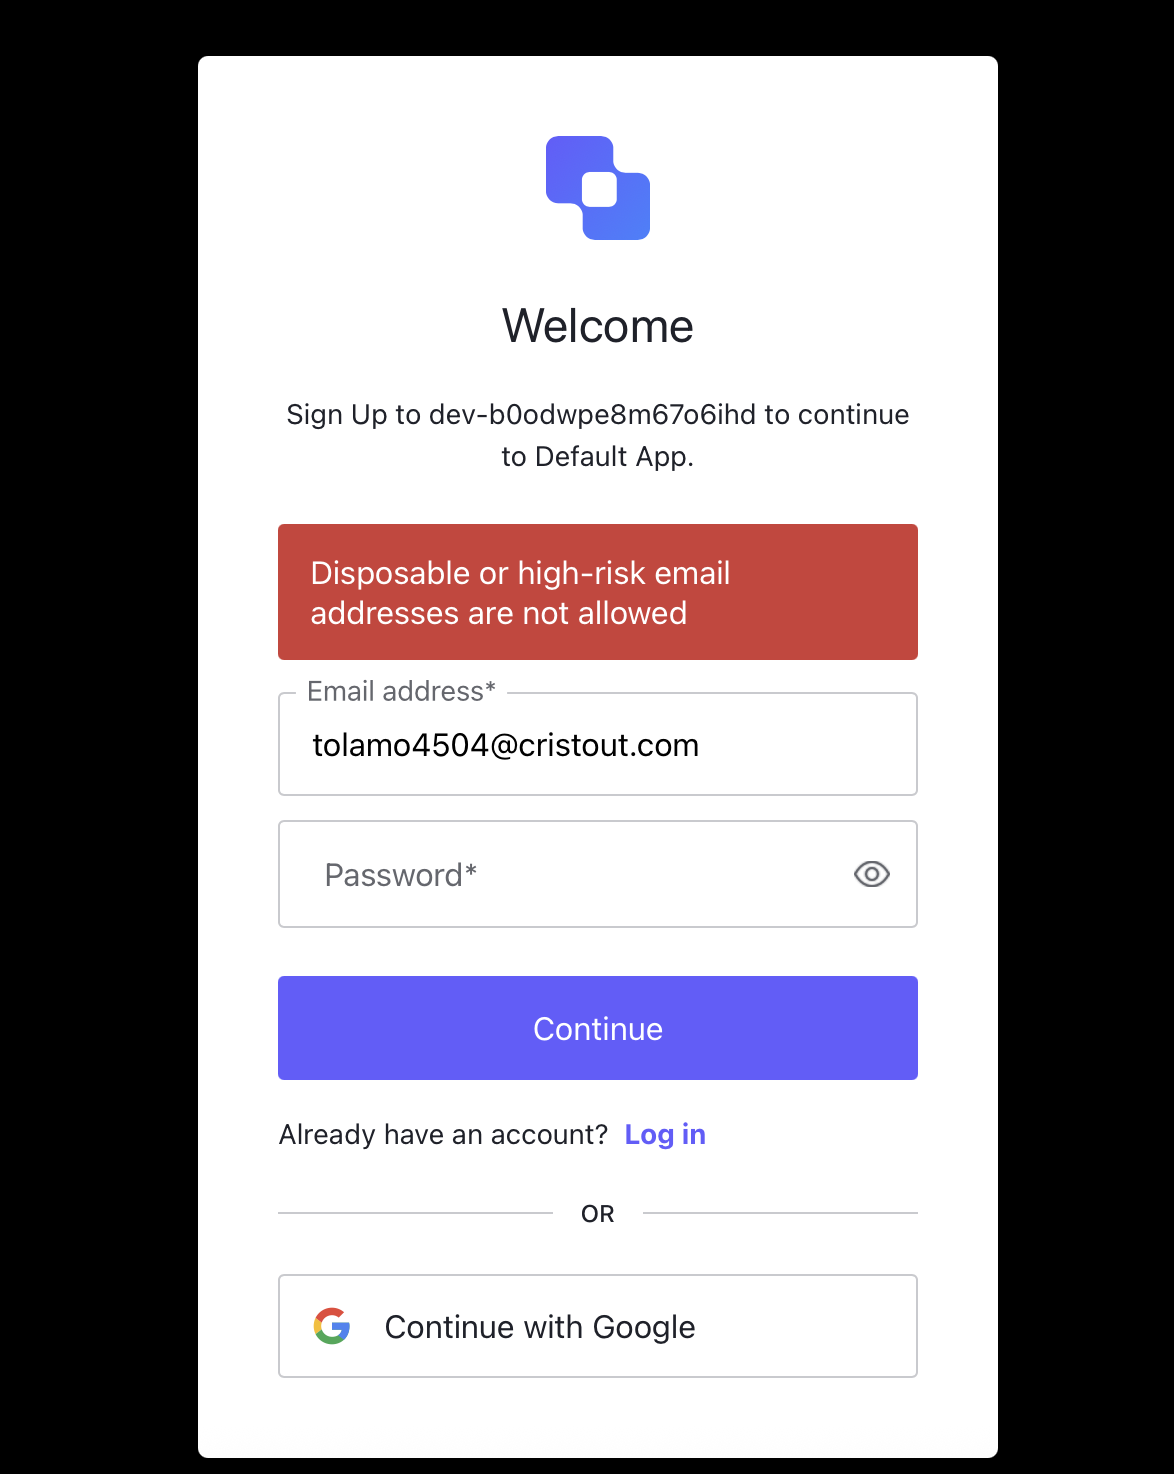
Step 6: Test your fraud detection setup
Now that everything is set up, we can test the entire flow. Starting with the account_register event, select a disposable email address (choosing any from your favorite search engine should be sufficient) and try to create a new account on Auth0.
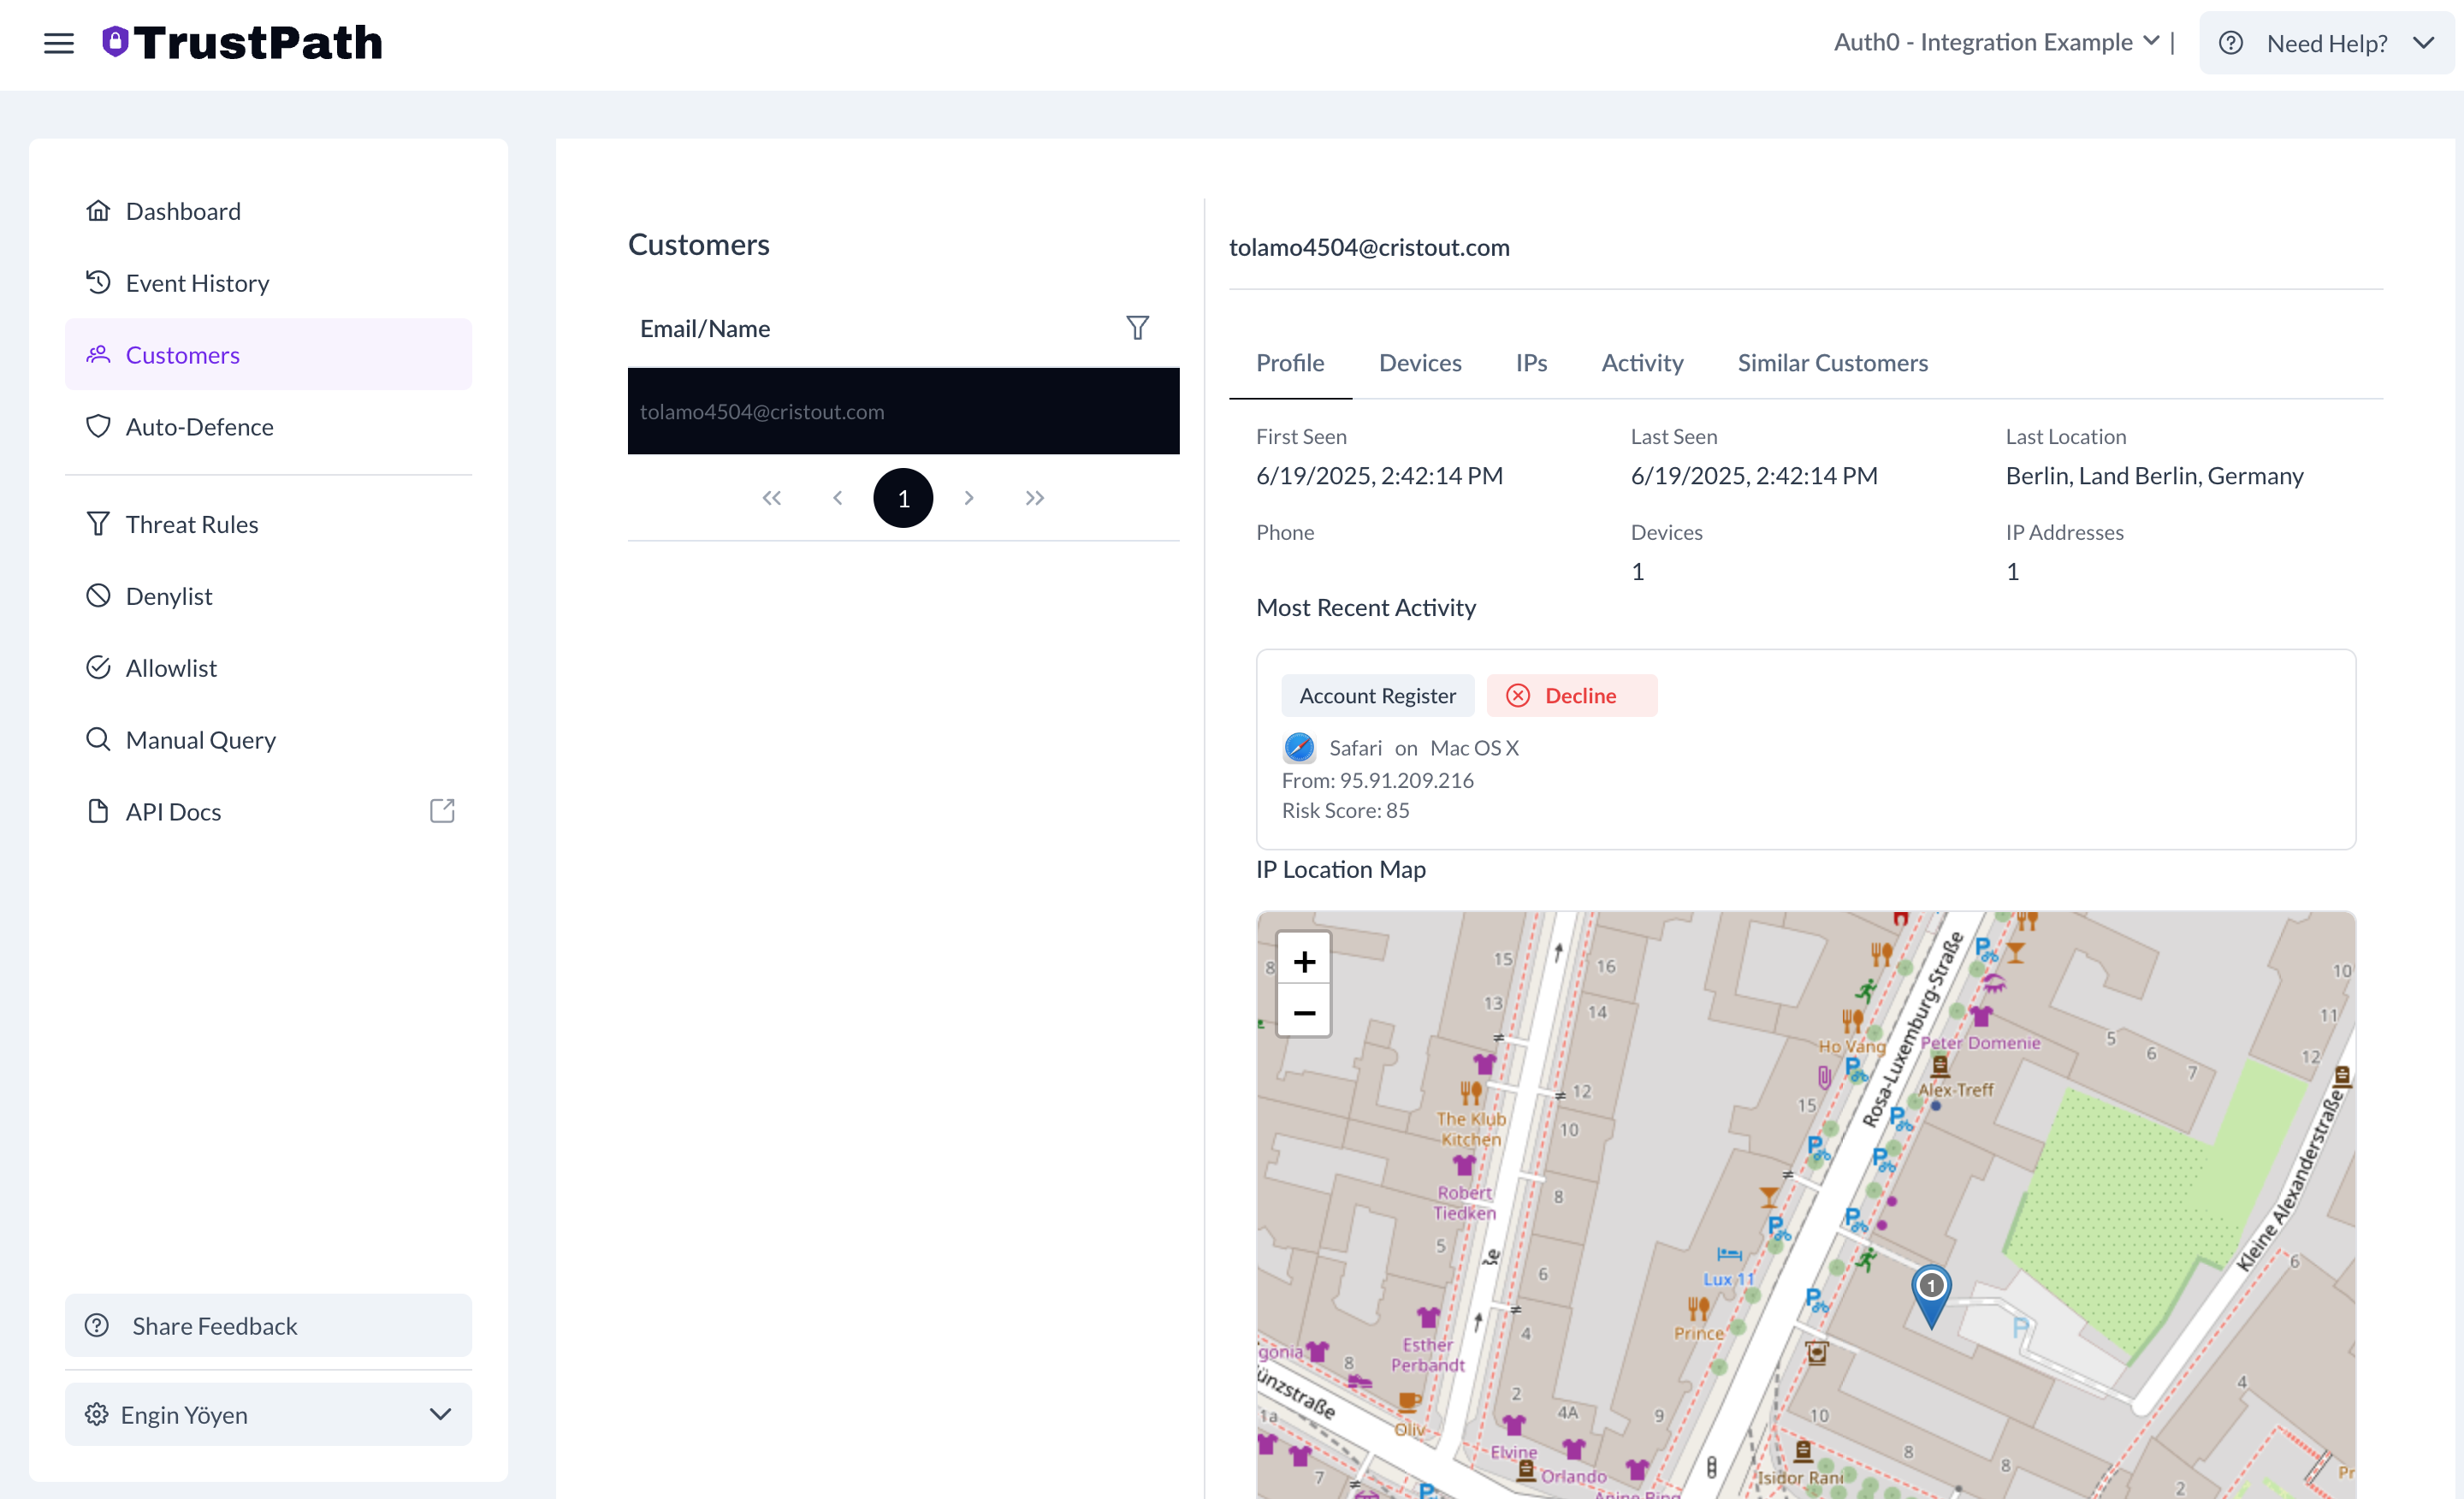
For testing purposes, I used a disposable email address and here is the result.
You can view all event details in the TrustPath console. Here is the particular email address that we used for testing:
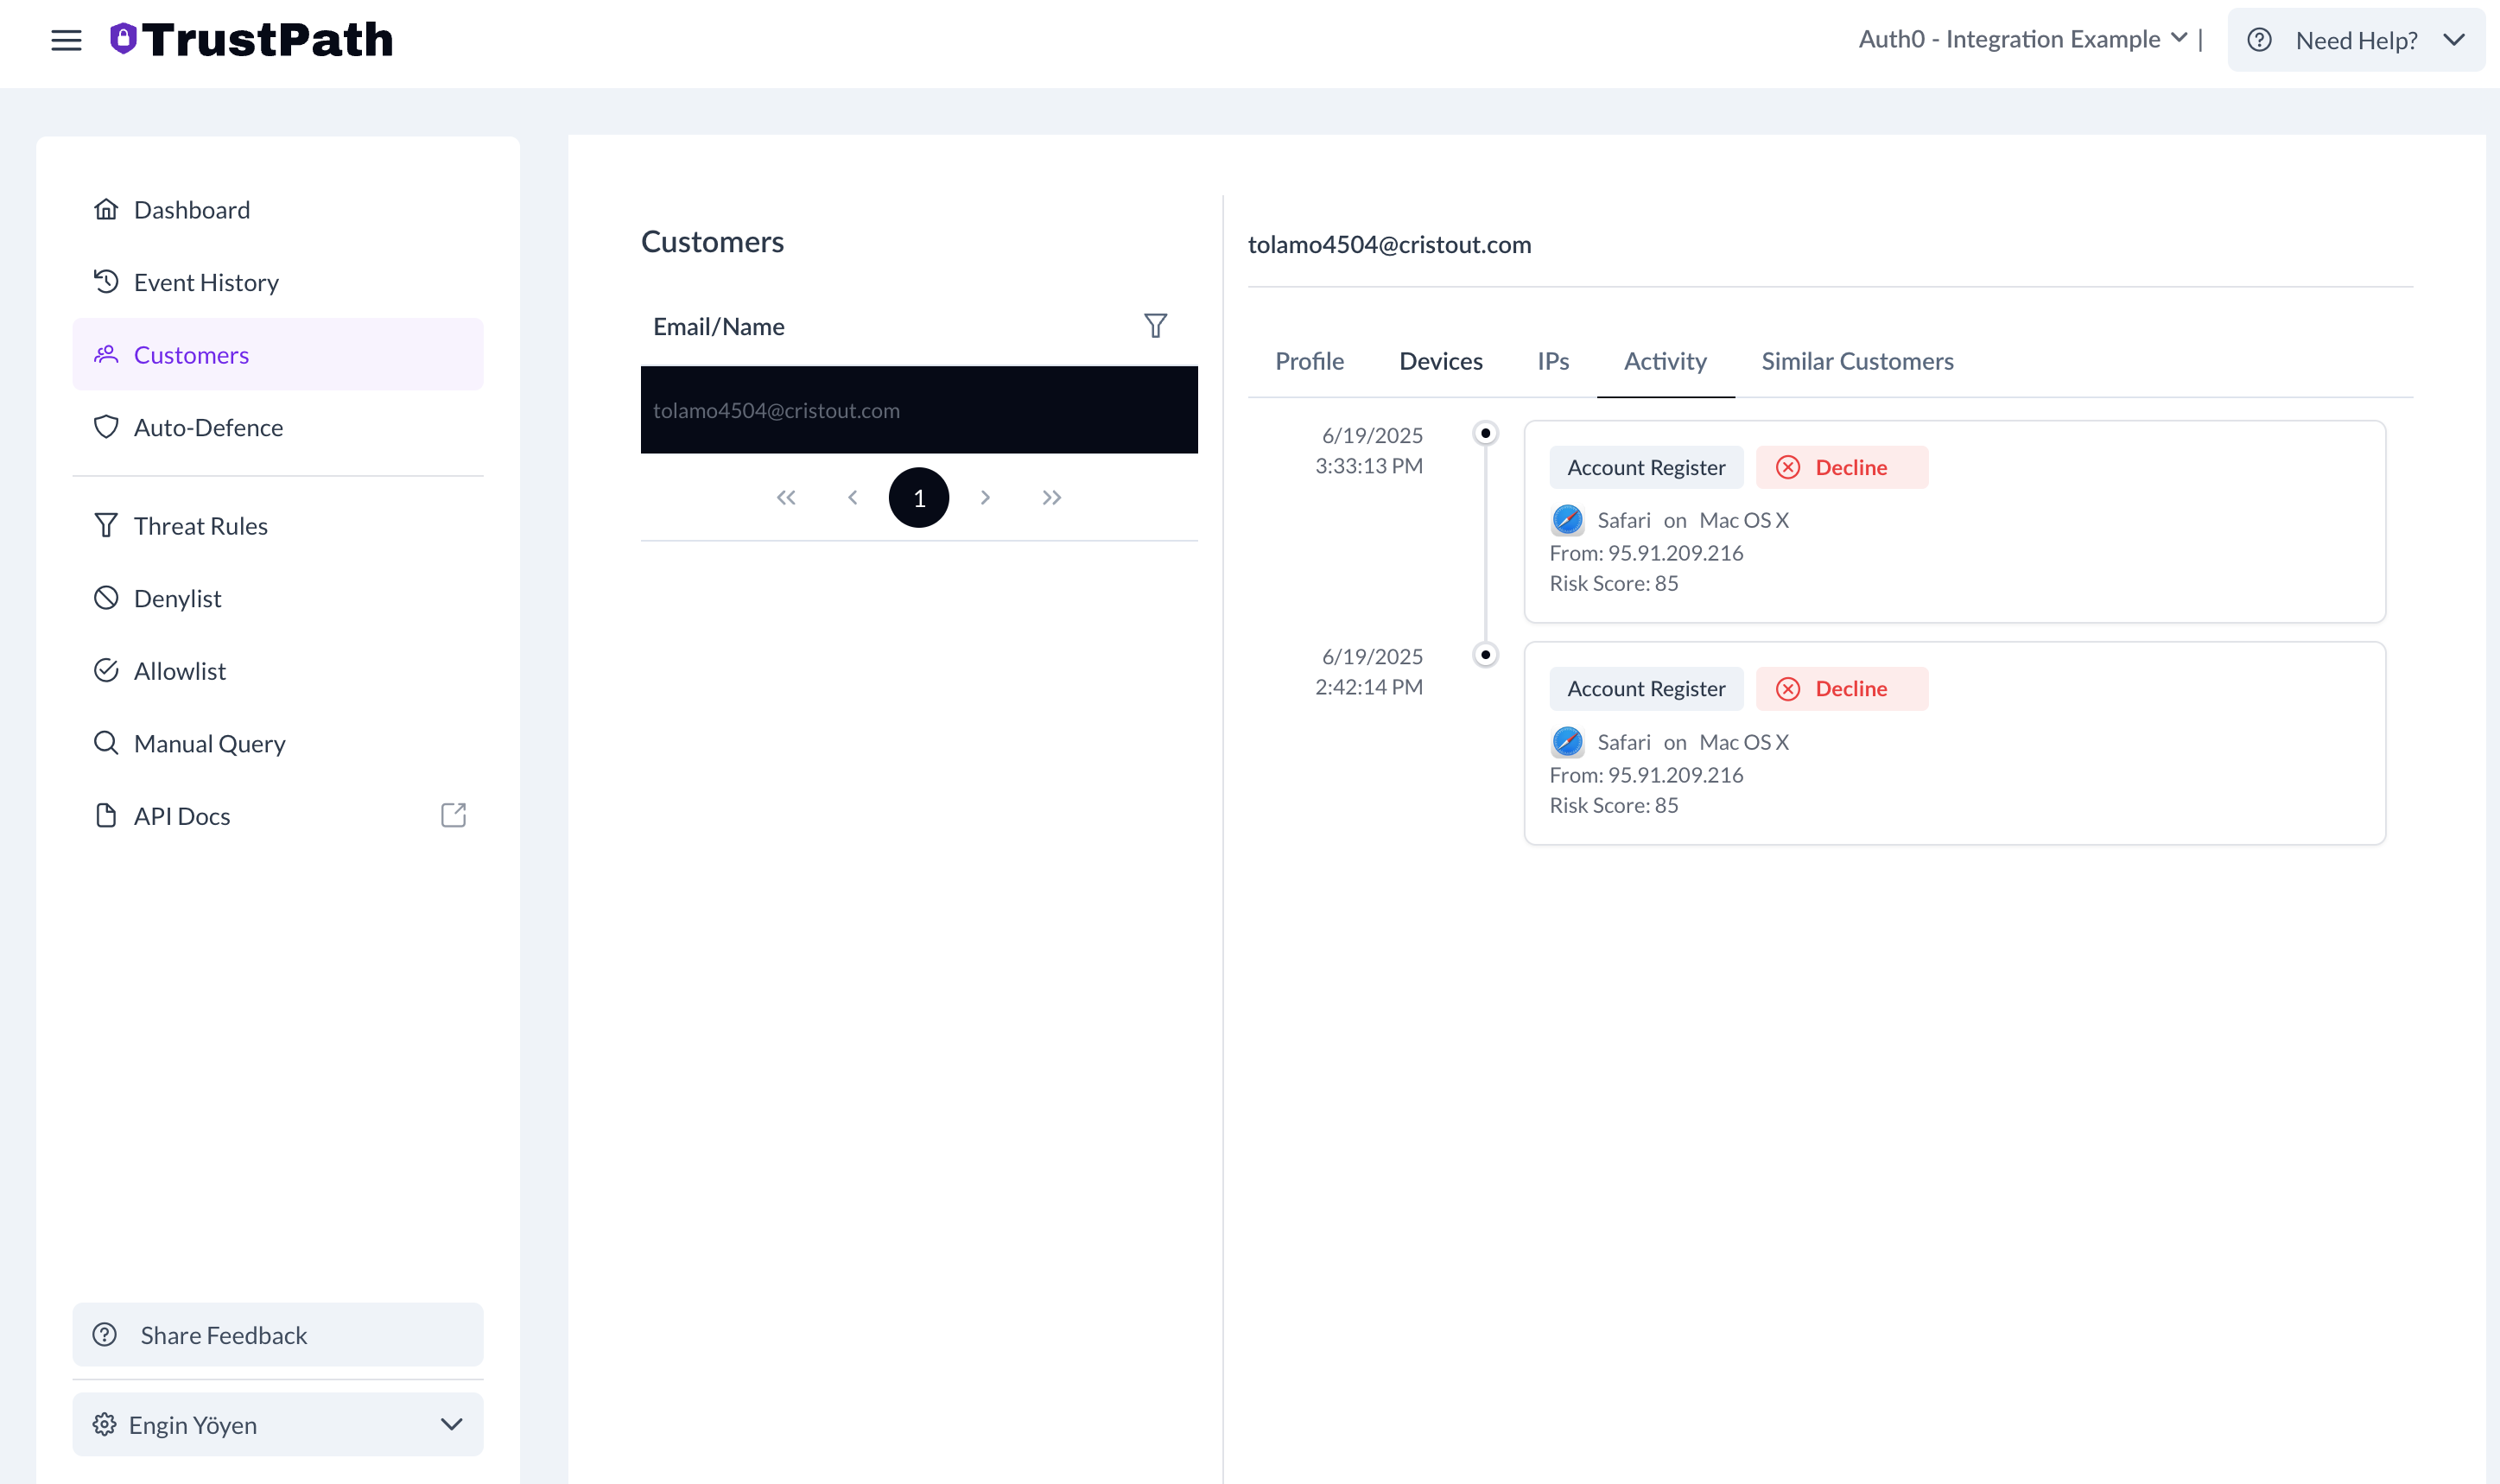
You can also see all activities that originate from a single user.
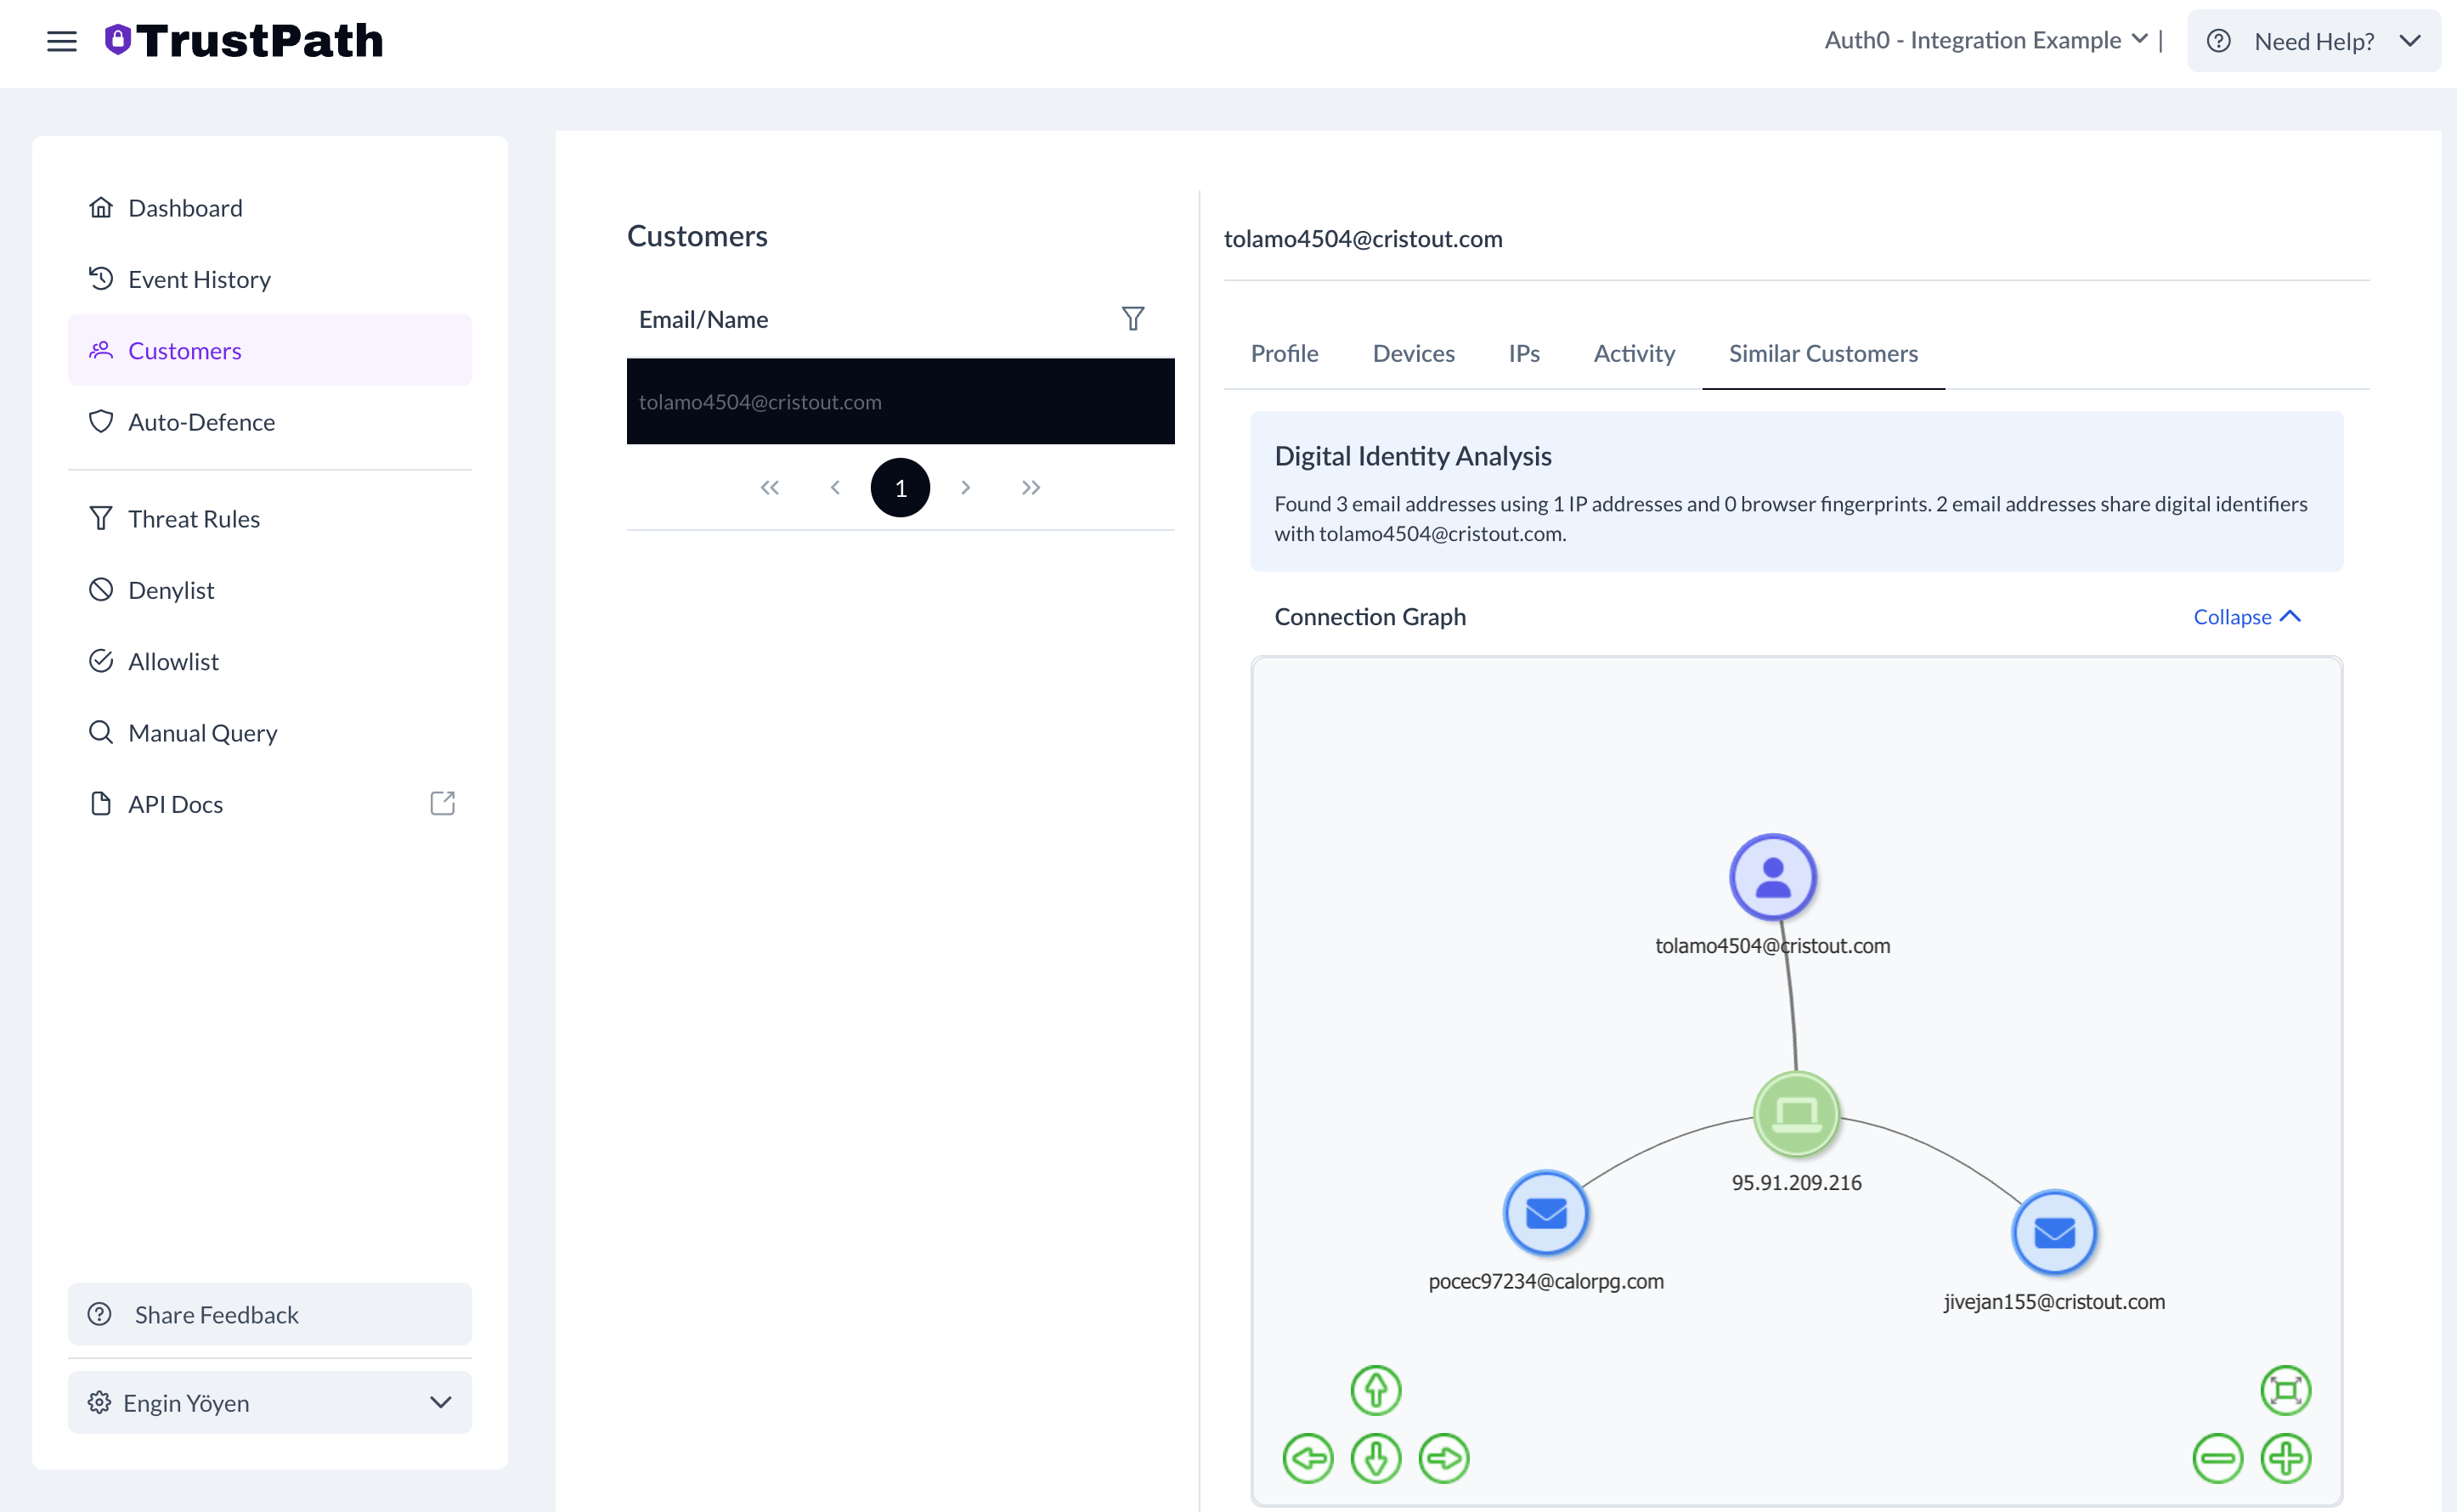
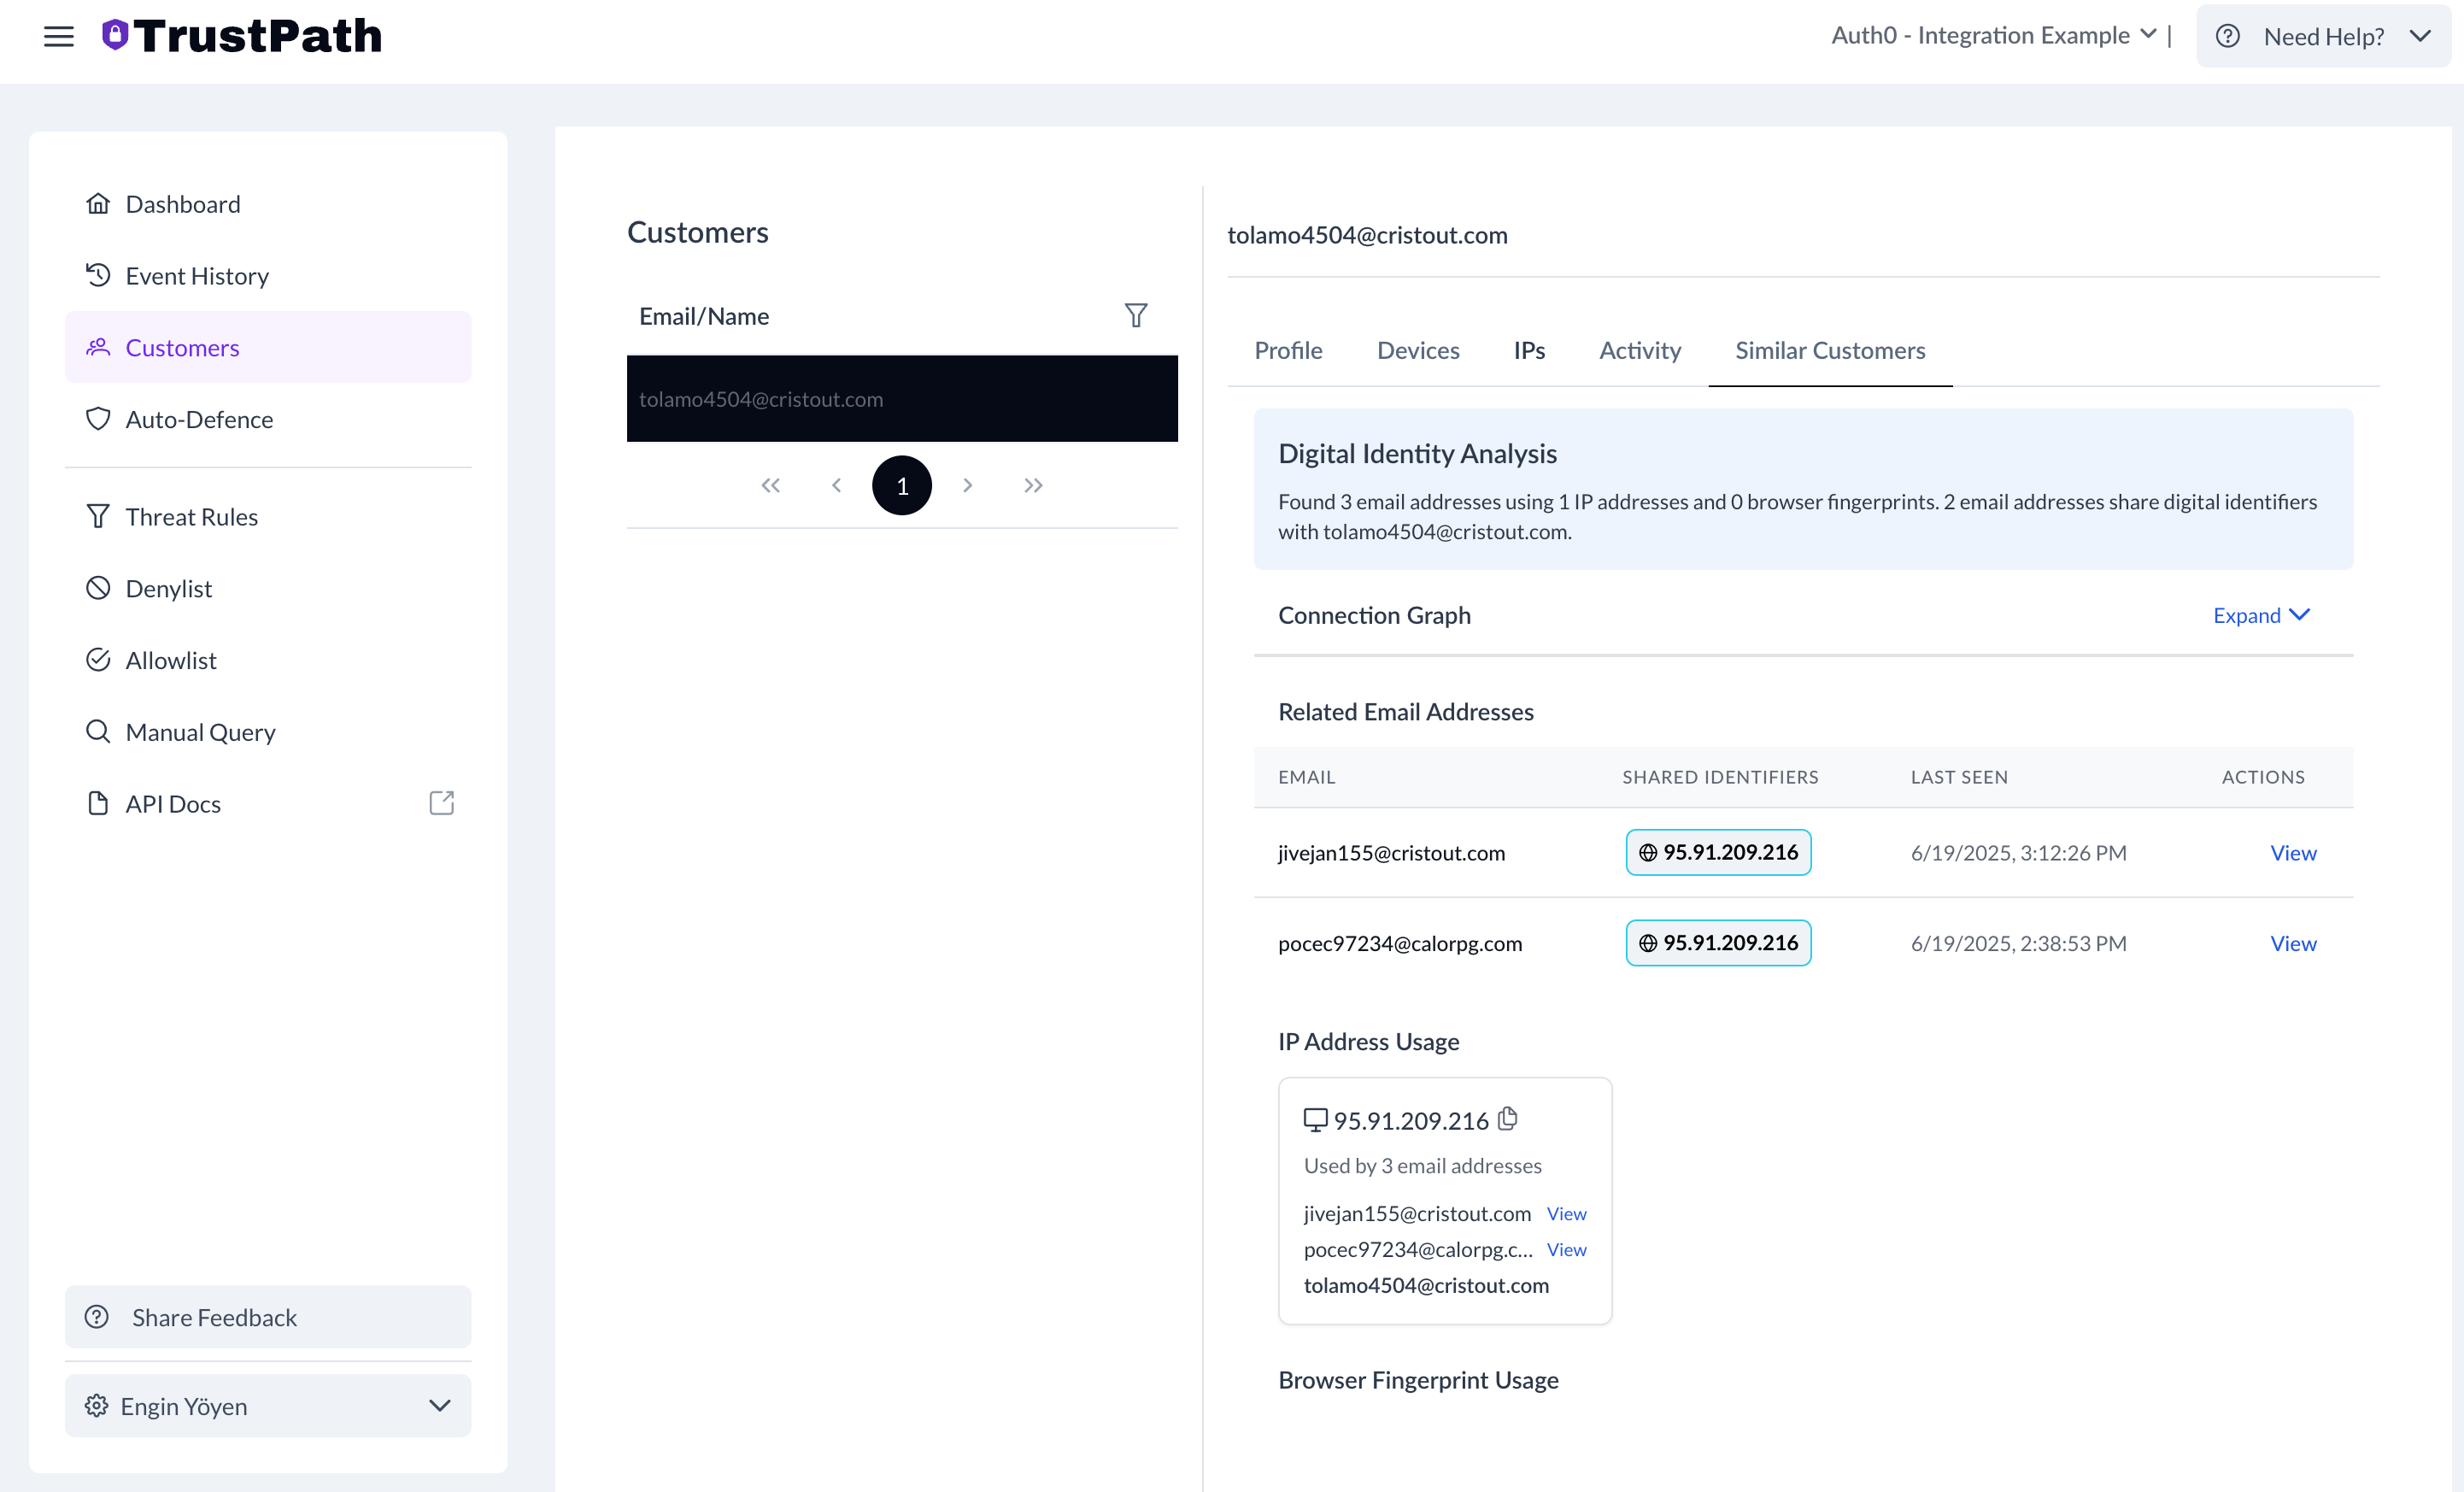
You can also see all similar users. Because this test was composed from a similar IP in a very short time period, the system shows similarities between users.
What Else You Can Do with TrustPath
You can also use TrustPath to prevent account takeover attacks by using the account_login event, detect credential sharing, and more. If you have any questions, please reach out to contact the TrustPath team.